Showing posts with label snacks. Show all posts

Saturday, April 25, 2015

Game of Scones


What comes to mind when you think of the wildly popular HBO series Game of Thrones? Sex, darkness, blood and surprise top my list. Also blonde hair envy...damn. So what does any of that have to do with baking scones?

For my part, scones and I have a love-hate relationship. I love eating them, I hate making them. I always make a gigantic mess while rolling out the sticky dough, invariably spilling flour everywhere which forces my nails into the palms of my hands with surprising force--blood.

The darkness comes from the fact that scones should be baked blind: as in, leave that oven door shut. Opening and closing it over and over again to check the doneness of the scones changes the temperature inside and can reduce fluffiness.

Scones are not really a sexy food either. They're more of an old British grandma drinking tea with her ankles crossed prettily. These scones, however, combine tart lemon and sweet berries in a way that could only be described as food porn. Sex on a scone.

And finally surprise: when I take the first bite of a steaming hot scone fresh out of the oven, I'm instantly inspired to bake more, even though I know it makes me crazy.

These lemon berry scones use greek yogurt which makes them a little bit lighter than normal scones which use cream. That's not to say they're healthy in any way--they're not. But who cares? They're so good it really doesn't matter. And they're too much work to make with any sort of regularity. The trick to good scones is to not handle the dough very much. As with any flour-based baked good, the more you mess with it the worse it will be. Feel free to use blueberries, raspberries and blackberries in any combination for this recipe. There's no way it can be bad.

Ingredients:
2 c. flour
1/2 tsp. baking soda
1/2 tsp. baking powder
1 tsp. lemon zest, finely grated
1/4 tsp. salt
1/4 tsp. turbinado (large-grain) brown sugar
Scant 6 tbs. unsalted butter, cubed and chilled
1 c. greek yogurt
Milk for extra moisture (if necessary) and brushing.
1 heaping cup mixed berries

For the icing:
3/4 c. powdered sugar, sifted
1 tbs. lemon juice
1 tsp. lemon zest

1. Preheat oven to 415F.  Line a flat baking pan with baking paper and set aside.

2. Add flour, baking powder, baking soda, salt, sugar and lemon zest to a large glass or ceramic bowl. Add the butter and use your fingertips (or a food processor) to incorporate it into the flour until the butter is incorporated throughout the flour in the size of small peas (same as making pastry dough).

3. Gently stir in the berries and then add the yogurt. Fold through gently. Add a splash of milk if mixture is too dry.  Do not over-mix.

4. Form the mixture into a ball by kneading gently and place onto a flat, clean, lightly floured surface.  Pat into a round of around 2 inches thick. Slice into triangles and place onto the prepared baking pan, putting the triangles back into the round shape.
5. Brush the tops with extra milk and bake for around 20-25 minutes or until light golden brown on the top and cooked through.
6. While the scones are baking, combine all the ingredients for the icing and whisk hard until they are all incorporated and the glaze is smooth.
7. Transfer scones to a wire rack to cool.  Once completely cool, ice tops with lemon drizzle.

This recipe is originally from A Splash of Vanilla.

Saturday, April 18, 2015

Undercover Lovers

Here's the thing about most foods -- they are at least 46% tastier when dipped or coated in a sauce. That's a verifiable, scientific fact. Look it up. I'm an expert when it comes to sauces. From tangy-sweet balsamic glazes to blow-your-head off curry sauces to unrepentantly garlicky dips, I love a good dunk.

But sauces shouldn't be limited to the savory realm of foods. In fact, I would like to take it upon myself to help reinvent the sad state of the dessert sauce. I feel like every time I get a dessert in a restaurant it comes with some sad, jarred "caramel" sauce that tastes more like fake vanilla flavor than anything resembling true caramel or a pathetic swatch of raspberry jam that's been reduced with a splash of lemon juice. PUH-LEEZ (insert Liz Lemon eye-roll here).

This whole issue is part of a larger theme in the restaurant industry of laziness and boredom when it comes to the dessert menu, a topic I will touch upon at a later point in time.  But I am here to rectify, in a small part, that hideous trend of jarred pseudo-creativity.

And therefore I bring you a quick and easy dessert that combines a trio of nature's most compatible flavors, perfect for a quick snack or as an indulgent breakfast topping. Easy enough that you could make it right now, healthy enough that you won't feel bad about not sharing, tasty enough that you won't even think it's healthy: frozen banana slices nestled under a dark-chocolate peanut butter sauce.

I know this doesn't push the envelope all too much in terms of sensationally creative thinking but at least everything here is made from scratch. I highly recommend making your own peanut butter if you have a blender or a food processor; it's incredibly easy and, if you can buy nuts in bulk, far cheaper than store-bought.

Make sure you cover the baking sheets with parchment or waxed paper before freezing the banana slices or they will stick to the metal forever. Additionally, feel free to top the banana slices with your choice of add-ons: crushed nuts, shredded coconut, cacao nibs, carob bites -- the choice is wholly yours. Just make sure you freeze them through completely before eating. You can also use milk chocolate if you aren't vegan or skip the peanut butter if it's not your style.

With hot weather right around the corner, these are a fantastic alternative to calorie and preservative-laden ice cream treats. I won't tell Ben and Jerry if you don't tell Häagen and Dazs.

Ingredients:

2-3 ripe (but not mushy) bananas, sliced into 1/2 inch rounds
1/2 c. smooth, unsalted peanut butter
8 oz.  bittersweet chocolate, roughly chopped
3-4 tbs. your choice of toppings (see above)

1. Arrange the banana slices on a large baking sheet covered with waxed or parchment paper.

2. Melt the chocolate over medium-low heat in a double-broiler until completely smooth. Alternatively you can melt it in 30-second intervals in the microwave, but watch it carefully so it doesn't burn.

3. Carefully whisk in the peanut butter until completely incorporated.

4. Using a fork or whatever kitchen implement you find easiest, (kebab skewer? toothpick?) dunk the banana slices into the chocolate mixture and coat evenly. Shake off any extra chocolate sauce.

5. Sprinkle banana slices with your choice of toppings and freeze until solid, about 2 hours.

Monday, April 6, 2015

I Can't Believe it's Not (Peanut) Butter!

Here is a true fact about me: I am wholly, unabashedly, potentially dangerously, unrepentantly addicted to peanut butter.

I have been known to eat it with a spoon straight out of the jar...at someone else's house.

Seriously, I might have a problem.

So much so that I made Tommy bring a 1 lb. jar of Whole Foods All Natural Crunchy to Spain with us (taking the place of several very important things he intended to pack). NOT SORRY.

My sainted mother sent me another jar just a few months later and we had been portioning it out (read: I was not allowed to stick a soup spoon in there for breakfast) until further supplies could be located.

But then Tommy got me/us a blender for Valentine's Day. Romantic, I know. No seriously, he knew how much I wanted one. And in between hummus and velvety-smooth soups, Tommy decided to make peanut butter.

And make peanut butter he did. This is without question the best peanut butter I've ever tasted. Between the two of us we were taking "healthy fats" to a whole new level. It was getting somewhat worrisome. Everything went out the window when he added a whole bar of dark chocolate to the last batch. I don't even have words for it. I was almost mad at him, it was that good.

Then Tommy decided he was going to make almond butter. I am a big fan. Not only is it a fun change from my BFFPB but it is also crazy delicious in its own right. Huge shoutout to MaraNatha which makes my current favorite basic almond butter.

We decided to get fancy with it and make vanilla almond butter with cinnamon and while we nearly set the blender on fire, the butter was DEFINITELY worth the squeeze. Would we make it again without a proper food processor? No, probably not. It was a pain. But once I get back to Chicago, all bets are off.

Also fun fact, almond butter is Kosher for Passover whereas peanut butter is not. I know. Worst holiday ever. At least Yom Kippur is only one day of torture.

A quick note: be patient with the poor almonds. It takes about 15 minutes for the butter to really get going. Don't give up on them.

Ingredients:
2 c. raw almonds
2 tbs. honey
1 tsp. vanilla
1 tsp. cinnamon
1/2 tsp. sea salt

1. Carefully toast the almonds in a large saucepan over medium-low heat until fragrant, about 5 minutes. Watch them carefully so they don't burn. Let cool.


2. In a blender or a food processor, combine all the ingredients.


3. Pulse until the almonds are grainy and pretty finely ground, about 1-2 minutes. Scrape down the sides as needed.


4. Let the blender/food processor run for about 10-15 minutes until the oils start to release. Again, scrape down the sides as needed, and again BE PATIENT.

Enjoy on toast, apple slices or a spoon.

Tuesday, January 22, 2013

Guess who's back?

So my fine lovely ladies and gents I took a rather long break from blogging while I was home after Spain to recharge my batteries and do absolutely nothing but watch Real Housewives of Miami and snuggle with my cats. I also chipped my front tooth but that's another story. Yes, I know you're jealous of my extremely awesome break.

In any case, now that the semester is about to kick off, the kitch is back to supply you with some supremely excellent fare for the coming months.

I don't usually apologize for things because I don't like doing it but I'm very sorry if I disappointed you by not making public my short break from BiteMe. It definitely doesn't mean I love you any less. I hope you didn't cheat on me with another  (obviously inferior) food blog during my time away.

Now without further ado, let's make some hummus bitches.

Yes, you read that right: hummus. Stop buying those tubs of overpriced slop in the grocery store because it takes about 10 minutes to make your own and it is unbelievably delicious. Also much healthier because it doesn't involve preservatives or weird hydrogenated oils.

If you don't have a food processor (and I highly suggest you buy one) you can mash all the ingredients by hand with a potato masher or a billy club. If you have a food processor you can just throw everything but the parsley in there and be done with it.

I like tempering the health-factor of the hummus with stacks of warm pita bread (Kronos brand is my personal favorite due to its fluffiness) but if you're absolutely no fun at all or happen to be gluten free, you can obviously use any sort of veggie as a dipping apparatus. Or you know, your finger. Or a spoon. I may or may not be guilty of doing both.

Ingredients:

1 15-oz can of chickpeas, liquid reserved
3 medium cloves of garlic, minced
Juice of 2 medium lemons
3/4 c. tahini (sesame seed paste found in most grocery stores)
1/2 tsp. kosher salt
1/4 tsp. cayenne pepper
1/4 c. finely minced fresh parsley

1. Combine all the ingredients except parsley in a food processor and pulse until the mixture is smooth but not runny. If you prefer your hummus a little thinner, add the reserved chickpea liquid a bit at a time. Feel free to adjust the flavors to your own personal liking (I like my hummus spicier but some people don't).

2. Serve sprinkled with the chopped fresh parsley.

Tuesday, November 13, 2012

Chip off the old block

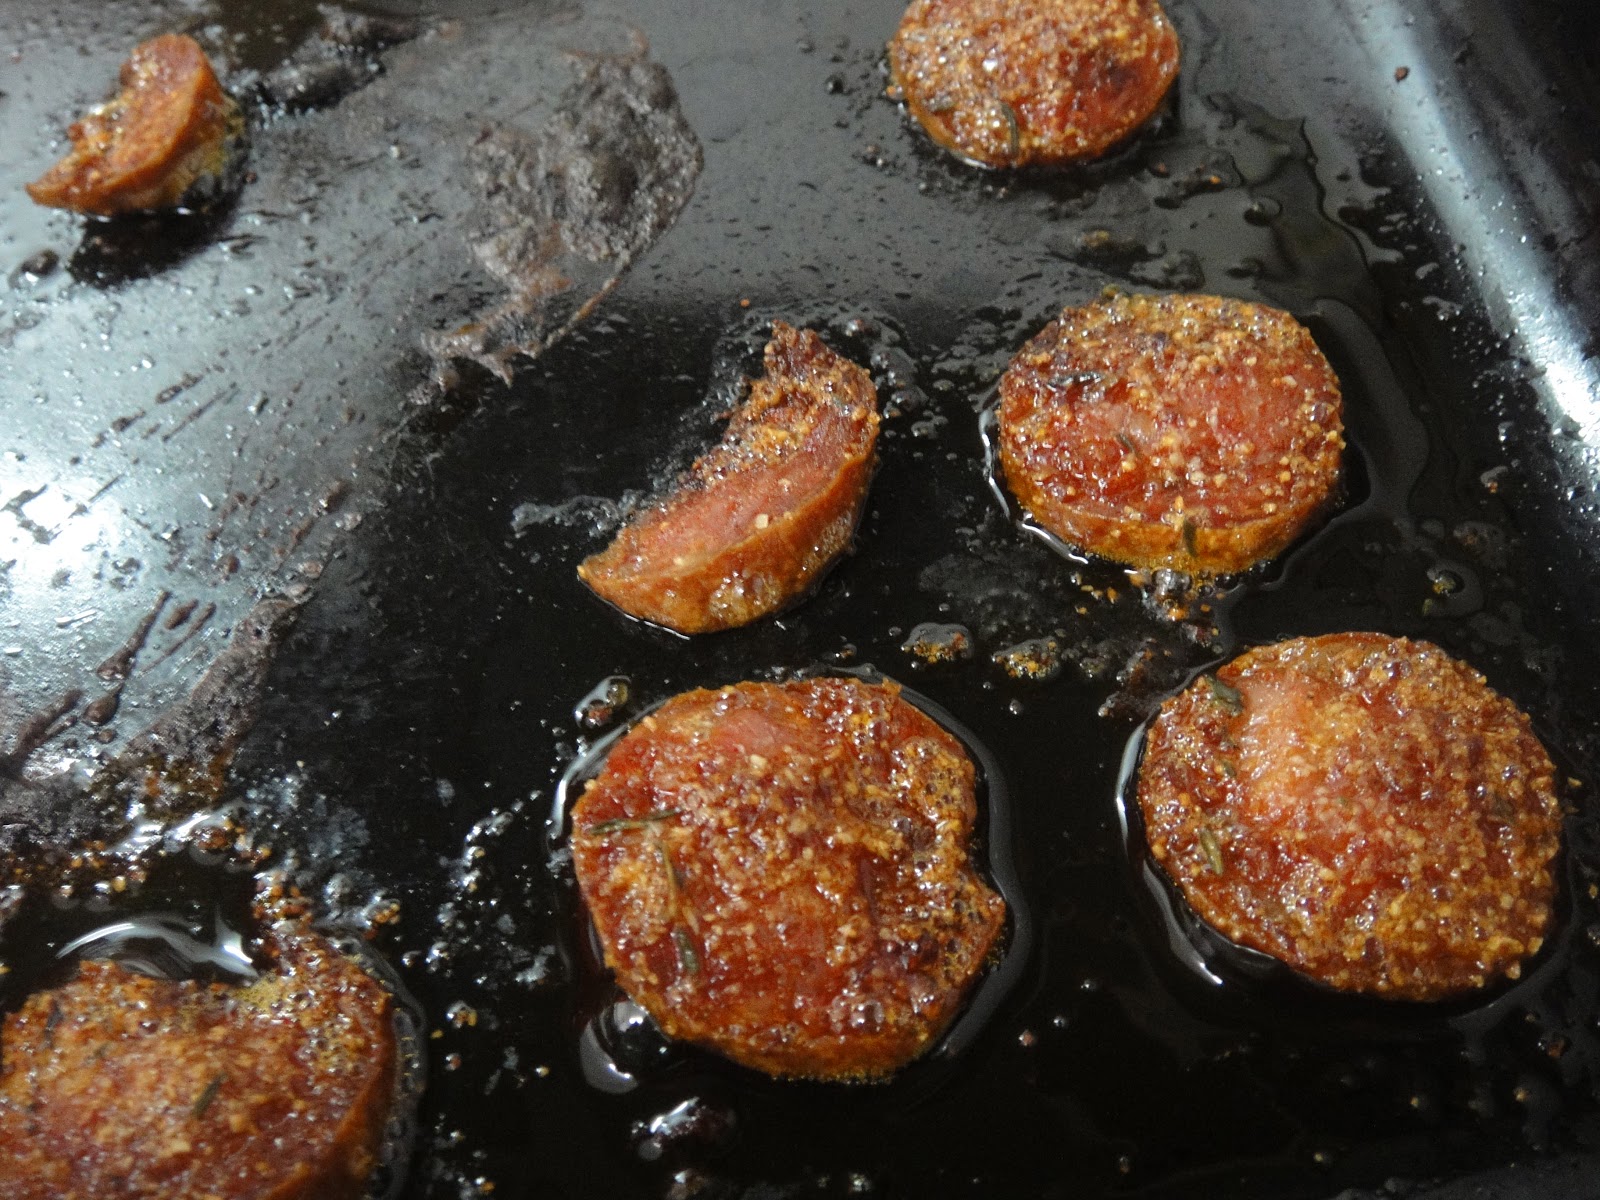
I bet you didn't know that if you have really gross cured chorizo you can slather it with a myriad of spices and bake it until it's crispy, and, once dunked in French's mustard, you will have a mostly edible chorizo chip.

This probably works even better with sausage you wanted to eat in the first place.

But we had a plethora of sausage we just didn't want to eat. And it didn't taste any better sauteed with some eggs and peppers.

It didn't even taste good with hot sauce.

So we got desperate.

...Desperately crafty that is.

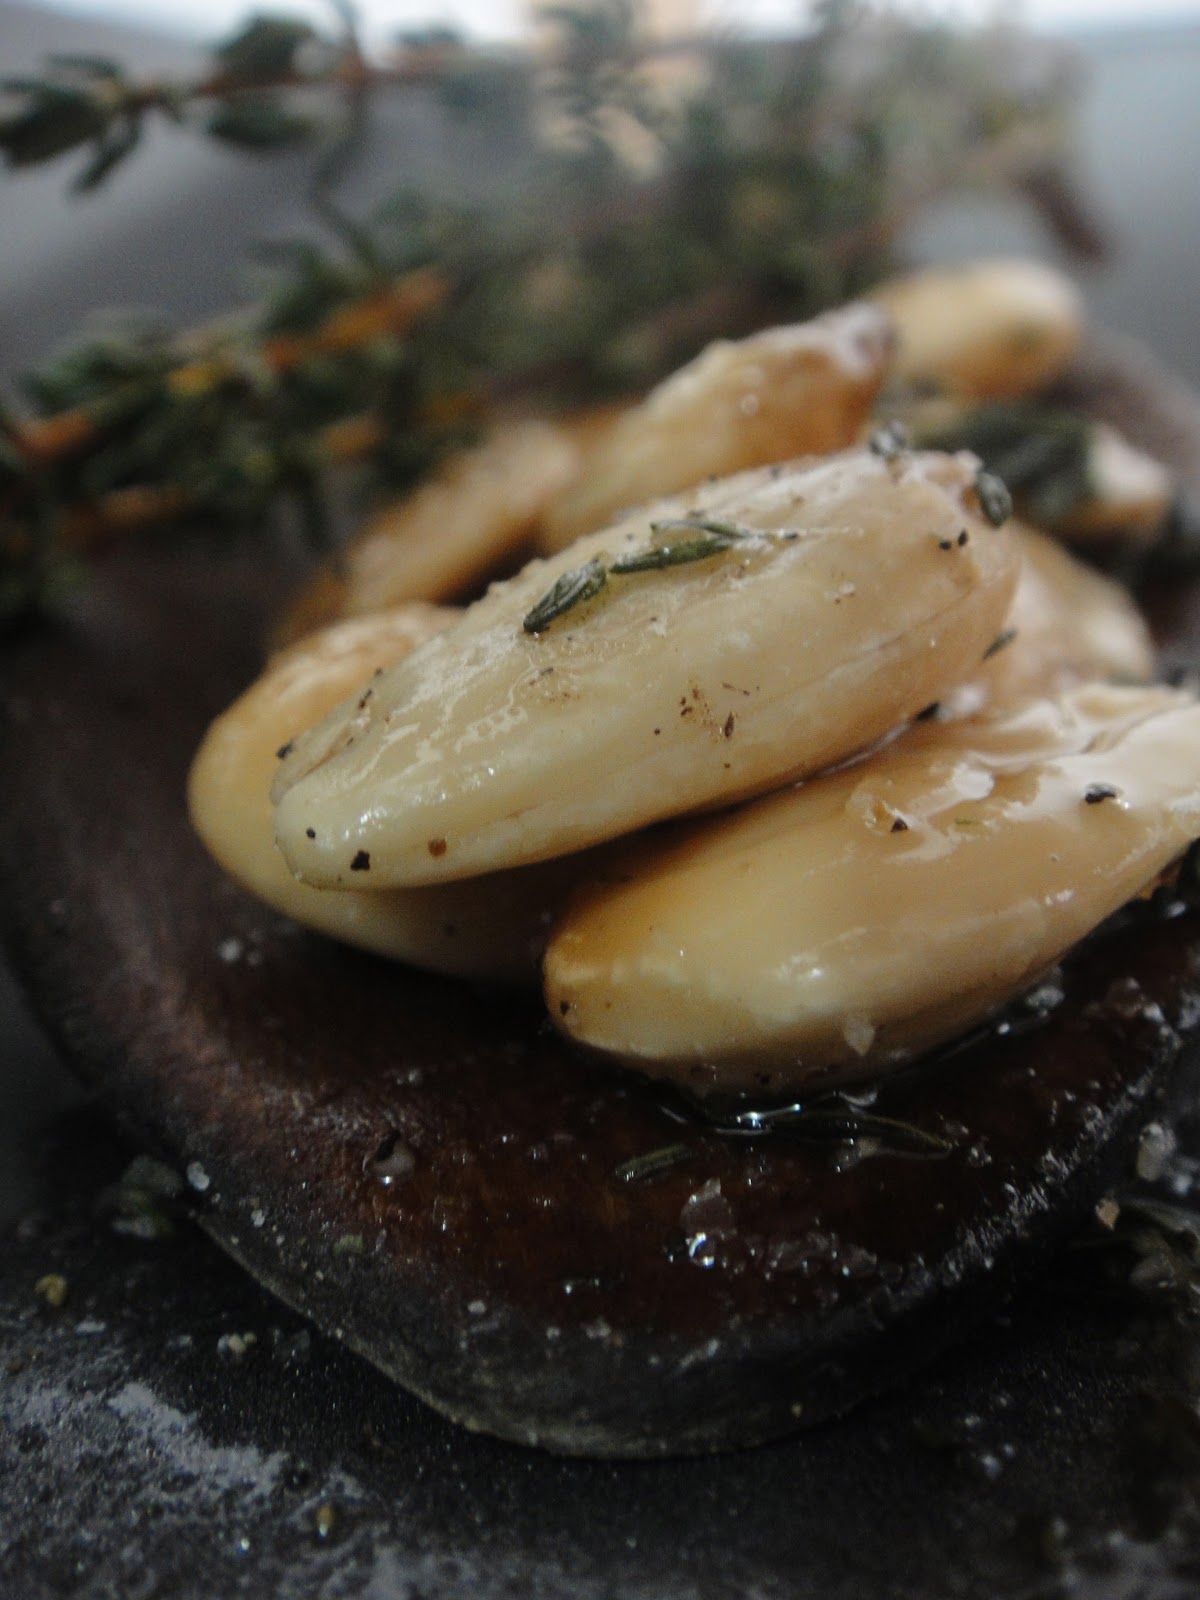
We also made use of the end of the thyme fried almonds by stealing the loose thyme and salt from the bottom of the tupperware.

Basically we just sliced this crappy chorizo really thinly and smeared it with more spices and then baked it and suddenly we had a whole new dish on our hands.

Oddly, some of the cured chorizo in Alicante smells awfully like Tommy's Sperrys he's had since freshman year of college. And that is not a pretty scent.

So anyway, like I said, if you actually liked the chorizo (or sausage or salami or other hard cured deli meat) you had to begin with, you can probably skip the seasoning step and skip straight to the baking/chowing down step.

If your chorizo is bootlike or not flavorful enough, feel free to do as we did and you will likely be pleased with the results.

Make sure to slice the chorizo really thinly (if it's not already machine sliced) because the crispiness is the good part.

Ingredients:
10-15 thin slices of chorizo, salami, etc.
1/4 tsp. cayenne pepper
1/4 tsp. powdered garlic
Pinch of dried thyme
Pinch of salt

Mustard for serving.

1. On a large baking sheet, arrange the sliced chorizo and sprinkle with the various spices.


Bake for about 8-10 minutes at 350 degrees Fahrenheit or until crisp. Serve immediately with mustard.


Sunday, November 4, 2012

Apples to apples

One more for you today because Dexter is taking a long-ass time to buffer. Also I'm feeling magnanimous and because I'll be gone in Barcelona this coming weekend so there will be no blogging.

I give you: apple salad.

This is one of my favorite breakfasts to make because it not only keeps me full for a long time it's also easy. You can also eat it for a quick snack to tide you over until your next meal and not feel badly about blowing calories on something from a vending machine.

This is always more fun if you have good stuff to put in it like pecans and hazelnuts and stuff like that but the bare bones (apples and yogurt) are good by themselves too.

I always use fat-free Greek yogurt in it because it has more protein in it and fewer calories than most other yogurts. And for god's sake, if you haven't heard this already stop eating "light" flavored yogurt because it's just packed with refined sugars and isn't really worth the calories. You're better off taking plain yogurt or plain Greek yogurt and putting a teaspoon of your favorite jam into it. And yes, just one teaspoon.

Anyway, back to apple salad. I like to spice mine up (ha ha) with a little cinnamon, nutmeg and ground ginger but you can do what you'd like. If plain yogurt isn't sweet enough for you, add a small drizzle of honey, although the sugar in the apple should be more than enough.

When I made this the last time, I added sultana raisins, hazelnuts and walnuts to the mix and it was delicious. Tommy ended up eating a lot more of it than I bargained for but oh well. It's so easy you can make it again in 5 minutes.

Ingredients:
1 half apple, cubed
5 oz. plain non-fat Greek yogurt (just one of those little cups)
1 tbs. raisins
2 tbs. chopped nuts
Pinch each of cinnamon, ground ginger, nutmeg

1. Mix all ingredients together in a small bowl and stir to incorporate the spices. Chow down, guilt free.

Thursday, November 1, 2012

Planet of the apricots

Today's blog post brought to you by one very abused blender and the Whole Foods Recipe app. Also a seriously lazy day.
A day when all I want to do is lay in bed and eat Halloween candy and granola bars.

Except the granola bars here in Spain are actually pretty terrible.

So Tommy and I decided to be happy hippies and make our own using the ancient blender at his apartment which got very very warm during the course of its use.

Whoops.

We found this recipe for hemp seed apricot chews on the Whole Foods app and immediately said something along the lines of, "ew effing gross" and "what in the name of Nestle is a hemp seed and why would one eat such a thing."

Then we decided to change the recipe to fit our own purposes (aka not so disgustingly healthy and crunchy) and we came out with a chewy bar that was totally delicious and a lot less expensive than the crappy granola bars I bought at the store here. It was also full of seasonally appropriate autumnal colors. 

Mission accomplished.

The only annoying thing was we had to blend in batches so we didn't set the blender on fire and if we had the magical contraption that is the food processor this would have been a lot easier. So take it from me: use your food processor if you have one.

We liked these a lot better when they were cold than when they were room temperature because they got kind of awkwardly sticky but that was just us. These are also pretty much pure fiber so don't go crazy when you eat them or you might end up one very unhappy camper in the intestinal region and have no one to blame but yourself.

These keep, wrapped tightly in saran or in an airtight container, for about two weeks in the fridge. We cut them into individual squares after chilling them the first time for convenience purposes. This is also one where you can screw with it as much as you like. Use dried cherries or cranberries instead of apricots or add figs or prunes or whatever other dried fruit you'd like. We would've added pecans if they existed in this country but they just don't.

Ingredients:
3 c. dried apricots, roughly chopped
1 c. chopped pitted dates
1 c. walnuts
2 tbs. lemon juice
1 tsp. ground nutmeg
1/2 tsp. ground ginger
1 tsp. vanilla extract

1. Line an 8x8 pan with parchment paper (or use a disposable metal one like we did) and set aside.

2. In a food processor, pulse all ingredients until a chunky paste forms.


 Transfer to the pan and press with a spatula to create an even thickness.


3. Cover and chill until firm, 1 to 2 hours, and then cut into squares for serving.


Monday, October 29, 2012

Scandy Sandy

This one goes out to all those on the East Coast who don't have school today thanks to one Hurricane Sandy, including my school (University of Maryland).

This means that Sunday Funday definitely happened last night and everyone is about to lose power today and continue to drink regardless...at least at my school anyway. We have our priorities in order.

Therefore I bring to you a recipe that involves absolutely no cooking at all and that can be made with the general contents of your pantry. Fraternity brothers, this probably excludes you but let this be a lesson to you in grocery shopping.
Spanish peanut butter < American peanut butter

I introduce to you: Balls of Fury.

Okay actually I hate that name but No Bake Energy Bites sounds really healthy and boring and I couldn't think of a hurricane-related name for these things.

Regardless of your inclement weather, these are delicious and very easy to make and you can adjust their health/junk food factor as you wish. I personally advocate for deliciousness over health in the case of these little snacks but if the junk in your trunk begs to differ feel free to do otherwise.

You can also add delicious things like Craisins or chopped nuts to the mix if you're feeling really fancy and/or have recently been to Trader Joe's. If you add more dry ingredients however, make sure to increase the proportion of the wet ingredients so it all sticks together.

And that's really all I've got. It's a simple recipe. I made them for the bus ride to Valencia and they went quickly. Tommy was super into them but he's not exactly a picky eater so take that as you will.

Oh I guess this is of marginal interest: I tried Valencian paella with rabbit, chicken and "vegetables" and honestly I could live a long time without ever eating it again. Not like it was bad but there was more bone than anything else and the rice and vegetables were really overcooked. I'm certainly glad I tried it though, can't go to Spain and not have paella at least once. Our program director and Tommy's Spanish roommate both said that Alicantian paella is far superior and recommended a restaurant for us to try so we might go round two in the near future.

But without further ado...No Bake Balls of Energetic Fury (?)

Ingredients:

1 c. rolled oats
1/2 c. smooth peanut butter
1/4 c. wheat germ
1/4 c. shredded coconut
1 tbs. honey
1 tsp. vanilla extract
1/4 tsp. cinnamon
1/4 c. dark chocolate chips
1/4 c. raisins/Craisins/chopped nuts

1. Put all dry ingredients in a large mixing bowl. Scoop liquid ingredients on top of dry. Mix together well, incorporating all ingredients and leaving no dry patches at the bottom of the bowl.


2. Chill for 30 minutes and then shape into 1-inch diameter balls. Store in a tightly sealed Tupperware for up to 3 days (they dry out otherwise) but I doubt they'll last that long.


Saturday, October 20, 2012

Aw nuts

HAPPY DOUBLE FEATURE DAY.

Yes ladies and gentlemen, two brand new recipes in one day thanks to the crappy weather here in Alicante. Everyone said before we left that it doesn't rain here. Hardly ever. Think twice a year. It's rained three times since we got here and always on the weekend. Um.

Anyway, I'm really into making snacks with whole nuts nowadays because they're not only Paleo diet friendly, they keep me full and they have good calories in them. What I really want is a friggin chocolate filled croissant but my sense of self preservation deters me.

So I made fried almonds instead.

With tons of fresh thyme that I got for free at the Mercado Central.

Life's easier when you bat your eyelashes and tell the vendor you need to practice your Spanish.

And cheaper.

This recipe actually originates from the one and only Martha Stewart who may be a moron (and looks terrible in orange) but knows how to make some damned good snack food.

Another fun point: this recipe takes about 15 minutes and has only 5 ingredients. I am all about that kind of convenience.


Besides being a great snack food, these would also be nice for a fancy appetizer if you ever have dinner parties or any other classy things like that.


Ingredients:
2 tablespoons extra-virgin olive oil
2 cups whole blanched almonds
2 tablespoons fresh thyme
Coarse salt and freshly ground pepper
1. Heat oil in a large skillet over medium heat. Add almonds and cook, stirring occasionally, until fragrant and light golden, 10-12 minutes.

2. Stir in thyme and remove from heat. Add salt and pepper to taste, then pour onto a rimmed baking sheet to cool completely. Once cool, store in an airtight container for up to two weeks.