Showing posts with label easy. Show all posts

Sunday, June 7, 2015

Strawberry Fields Forever

Hello friends, sorry about the recent radio silence. The padre and madre came to España and we have

been wandering around sweating buckets and looking at old things for the past week...

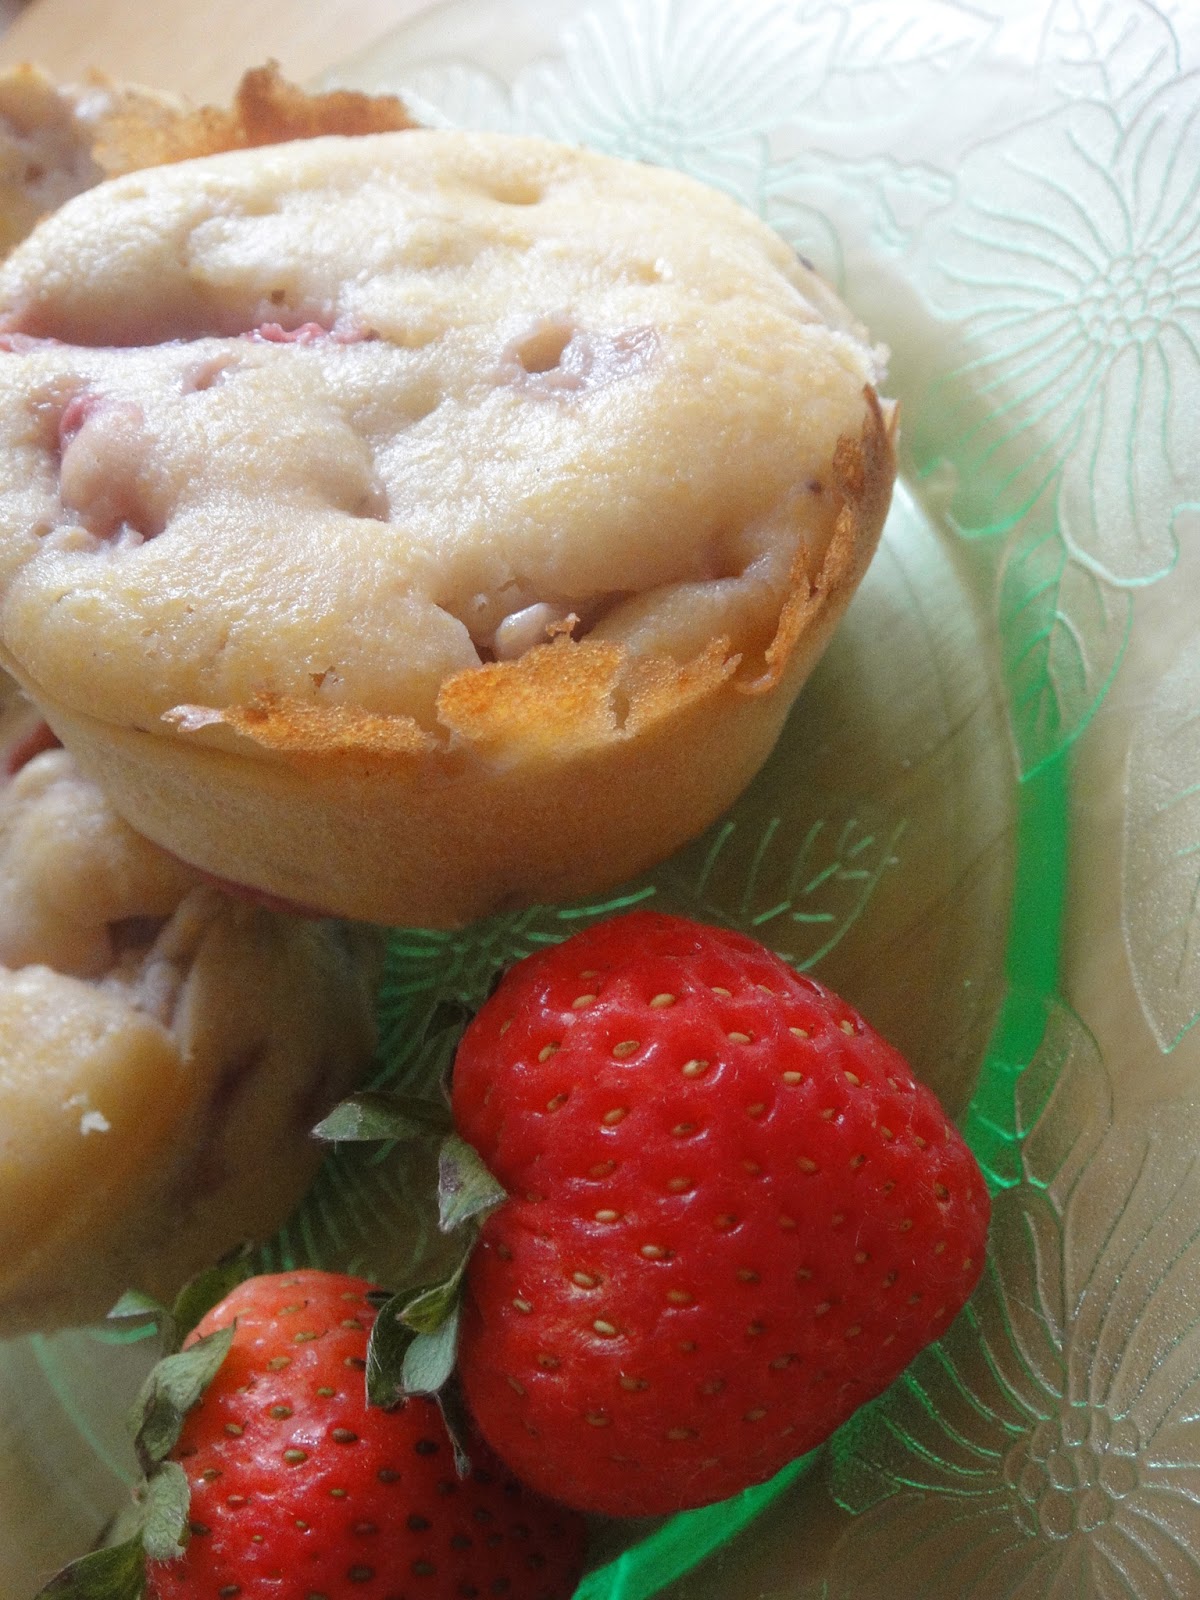
Today I have a quick-and-easy for you: strawberry corn muffins. Corn muffins on their own are kind of sad and unloved--unless you're at Jason's Deli where I have previously shoved a whole handful into my pockets for later consumption (why are they so good there???).

But aside from Jason's corn muffins are typically dry and flavorless and left standing alone when all the good flavor of muffins are gone...until these. These strawberry corn muffins are so dense and sweet and flavorful and basically exploding with fresh berry goodness that they will be gone before you can say strawberry fields forever.

These corn muffins are much healthier than your basic recipe because instead of using canola oil and white sugar they use strawberry yogurt. I am a big fan of mixing 1/2 c. plain non-fat yogurt with 1 tbs. all-fruit strawberry preserves but you can also use store-bought. These little beauties cook up in no time and look so pretty you can give them as a gift or bring them to a brunch.

I recommend using organic wild strawberries for these: they are very small and incredibly sweet and will change the flavor profile entirely. You can also use conventional strawberries but try and pick exceptionally flavorful ones. I have made these with both kinds of strawberries but the wild batch (thank you, Pittsburgh farmer's market!) won by a landslide. It's the perfect recipe to usher in late-spring/early summer produce and these born-again muffins will rock your world.


Ingredients:
1 c. cornmeal
1 c. all-purpose flour
3/4 c. strawberry yogurt
2 tsp. baking powder
1/2 tsp. salt
1 egg, beaten
1/4 tsp. vanilla extract
1/2 c. milk
1 - 1/2 c. ripe strawberries, hulled

1. Preheat oven to 400C. Grease muffin tin or line with paper liners.

2. In a large bowl, mix together dry ingredients. Gently stir in milk, egg, vanilla, yogurt and stir to combine. Fold in strawberries gently.

3. Bake for about 15-20 minutes or until golden brown and springy or a knife inserted into center comes out clean.

Wednesday, May 20, 2015

Mad Dills

Memorial Day weekend is a fantastic occasion for a number of reasons. Aside from the fact that it is an important time to honor and give thanks to all of our servicewomen and men for risking their lives (and don't you forget it -- beer comes second to this), it also serves as the start of grilling season.

Grillers, light your coals.

MDW is a culinary smorgasbord of crispy charred meats dripping with cheese. There are few things more inherently satisfying than a charbroiled burger with a fat slice of cheddar oozing over the sides. Lord have mercy.

Obviously all the classic grilled meats will come into play this weekend, but we would be loath to ignore the side dish on a weekend like this.

Sadly, hotdogs and hamburgers are the perennial stars and side dishes become congealed mayonnaisey afterthoughts, typically picked up at your neighborhood Jewel-Osco.

Let's change that this year. Let's say yes to cornbread, yes to bright and briny bean salads, yes to properly constructed slaws!

Preach, LL

I typically hate slaws -- more often than not they are overly sweet, drowning in mayo and hopelessly limp even before they've sat under the blazing sun for a few hours. The thing is, a good slaw is an excellent counterpoint to a hunk of grilled meat. Creamy, crunchy and tangy, meet greasy, chewy and juicy. Truly, a match made in heaven and a relationship that has lasted longer than 100% of Bachelor(ette) marriages.

This is a recipe for a beautifully simple and deliriously easy dill slaw. It doesn't have any white sugar or weird ingredients in it, and it'll go even faster if you get a bag of pre-shredded cabbage and carrots. Feel free to adjust the levels of seasoning, but remember that a slaw should be fairly mild so it doesn't overpower the main players.


Ingredients:
1 medium head green cabbage, shredded
1 c. shredded carrot
1 c. shredded radicchio (optional -- if added, increase mayo as needed)
3/4 c. mayonnaise
1 tbs. white vinegar
2 tbs. fresh dill, minced
Freshly ground black pepper to taste

1. Combine mayo, vinegar, dill and black pepper in a small bowl. Whisk to combine. Adjust seasoning to taste.

2. In a large bowl, mix together the cabbage and carrots until evenly incorporated. Fold in dill mayo and mix until well coated.


Friday, May 15, 2015

Puff Daddy

In my very educated opinion, no breakfast is complete without an egg. Be they scrambled, poached (in the dead of night, natch), sunny-side up or in an omelette, the egg is king of the breakfast castle.

Americans are all about the egg as part of a balanced breakfast but my Spanish school kids look at me like I'm loca when I say I had an egg on toast before coming to school.

What Spaniards have embraced, by contrast, is egg for every OTHER meal of the day, typically by way of tortilla española: an egg casserole filled with thinly sliced potatoes and, maybe, a little onion. Tortilla by itself is great but as far as I'm concerned, 90% of foods could seriously benefit from some cheese. Also, it's kind of a lot of work to make what with the slicing of the potatoes etc. etc. etc.

Therefore, I present to you a staple of the Suss family brunch, served year-round (except Passover). It's cheesy and full of saturated fat and a little spicy too. Best of all, it takes exactly 5 minutes to put together. Not to mention it refrigerates perfectly and reheats like magic. Serve it for any get-together, make it on a Sunday for easy weekday breakfasts or eat it for dinner with a simple green salad (aren't you classy!). Now without further ado...chili cheese egg puff.

Ingredients:

5 eggs
1/4 c. all-purpose flour
1/2 tsp. baking powder
1 c. cottage cheese
2 c. shredded Monterey Jack cheese
1/4 c. melted butter
1 tsp. crushed reds (or to taste)
1/2 tsp. freshly ground black pepper

1. Preheat oven to 350F. Grease an 8x8 baking dish.

2. In a large bowl, beat eggs well. Stir in the rest of the ingredients and pour into prepared pan.

3. Bake for 35-45 minutes or until top is brown and puffy and a knife inserted into the center comes out clean. Serve immediately.

Thursday, May 7, 2015

Orange You Glad...


...I'm not going to finish that horrible joke? The temptation was significant, let me tell you.

Sorry for the brief hiatus but Tommy and I decided to go to Switzerland for a long weekend. Yes, I know, I am living the dream. Also they really do know their chocolate and cheese out there.

Were it not for the fact that it is the most absurdly expensive place I've ever been, I would totally move there. Gorgeous scenery, amazing food and the cleanest bathrooms I've ever seen. Everywhere we went. Seriously. As those close to me can tell you, this is very important to me. In other news, after eating gruyere fondue in Gruyere (heh), The Melting Pot is totally ruined for me.

As fun as the weekend was, it was expensive and pretty darn heavy as far as culinary options go. We did manage to eat a ton of ethnic food however which made me incredibly happy. Thai, Indian and Ethiopian (Tommy's first time!) were all happily consumed. Especially the Ethiopian food. Those people know their way around a lentil, let me tell you.

Therefore, Tommy and I have wanted to keep things pretty light since we got home. Lots of fresh fruits and veggies, not quite as much chocolate (but really still kind of a lot...whatever). This is a whacked-out quasi-fruit salad that makes fantastic use of the wealth of citrus fruits we are blessed with out here, plus the overwhelming supply of olives. It sounds like a strange and even unappetizing combination but trust me, the sweet/sour/salty flavors play together in the nicest possible way.

Additionally, you don't have to cut the oranges into supremes (the fancy way to say peeled wedges) but it makes consumption easier and looks really pretty. Here's a good step-by-step tutorial if you're interested.

It's worth it to use good quality olive oil if you have it for this recipe. A bright, grassy flavor will play best with the citrus. If not, good old extra-virgin will do as well.


This is a great side dish and would pair well with most whitefish and maybe couscous. In fact, that sounds pretty damn good for dinner tonight. This also works best if it sits briefly (30 minutes, give or take) to let the flavors really meld. If you have culinarily adventurous friends, this would make an awesome potluck dish: you will look like a super inventive chef and you don't even have to tell them it only took 15 minutes to put together.

Ingredients:
4-5 oranges (mix of navel, blood, etc.), cut into supremes
1/2 c. pitted green olives, roughly chopped
1/2 red onion, chopped
1/4 c. good-quality olive oil
2-3 tbs. fresh chives, finely minced

1. Carefully supreme your oranges, or alternatively, slice them into thin rounds.

2. Combine the oranges, green olives and red onion in a medium sized bowl and drizzle with the olive oil, mixing to combine.


3. Refrigerate for about 30 minutes. Add chives just before serving.

Saturday, April 18, 2015

Undercover Lovers

Here's the thing about most foods -- they are at least 46% tastier when dipped or coated in a sauce. That's a verifiable, scientific fact. Look it up. I'm an expert when it comes to sauces. From tangy-sweet balsamic glazes to blow-your-head off curry sauces to unrepentantly garlicky dips, I love a good dunk.

But sauces shouldn't be limited to the savory realm of foods. In fact, I would like to take it upon myself to help reinvent the sad state of the dessert sauce. I feel like every time I get a dessert in a restaurant it comes with some sad, jarred "caramel" sauce that tastes more like fake vanilla flavor than anything resembling true caramel or a pathetic swatch of raspberry jam that's been reduced with a splash of lemon juice. PUH-LEEZ (insert Liz Lemon eye-roll here).

This whole issue is part of a larger theme in the restaurant industry of laziness and boredom when it comes to the dessert menu, a topic I will touch upon at a later point in time.  But I am here to rectify, in a small part, that hideous trend of jarred pseudo-creativity.

And therefore I bring you a quick and easy dessert that combines a trio of nature's most compatible flavors, perfect for a quick snack or as an indulgent breakfast topping. Easy enough that you could make it right now, healthy enough that you won't feel bad about not sharing, tasty enough that you won't even think it's healthy: frozen banana slices nestled under a dark-chocolate peanut butter sauce.

I know this doesn't push the envelope all too much in terms of sensationally creative thinking but at least everything here is made from scratch. I highly recommend making your own peanut butter if you have a blender or a food processor; it's incredibly easy and, if you can buy nuts in bulk, far cheaper than store-bought.

Make sure you cover the baking sheets with parchment or waxed paper before freezing the banana slices or they will stick to the metal forever. Additionally, feel free to top the banana slices with your choice of add-ons: crushed nuts, shredded coconut, cacao nibs, carob bites -- the choice is wholly yours. Just make sure you freeze them through completely before eating. You can also use milk chocolate if you aren't vegan or skip the peanut butter if it's not your style.

With hot weather right around the corner, these are a fantastic alternative to calorie and preservative-laden ice cream treats. I won't tell Ben and Jerry if you don't tell Häagen and Dazs.

Ingredients:

2-3 ripe (but not mushy) bananas, sliced into 1/2 inch rounds
1/2 c. smooth, unsalted peanut butter
8 oz.  bittersweet chocolate, roughly chopped
3-4 tbs. your choice of toppings (see above)

1. Arrange the banana slices on a large baking sheet covered with waxed or parchment paper.

2. Melt the chocolate over medium-low heat in a double-broiler until completely smooth. Alternatively you can melt it in 30-second intervals in the microwave, but watch it carefully so it doesn't burn.

3. Carefully whisk in the peanut butter until completely incorporated.

4. Using a fork or whatever kitchen implement you find easiest, (kebab skewer? toothpick?) dunk the banana slices into the chocolate mixture and coat evenly. Shake off any extra chocolate sauce.

5. Sprinkle banana slices with your choice of toppings and freeze until solid, about 2 hours.

Tuesday, April 14, 2015

Now You Sear Me, Now You Don't

Searing food is about as close to magic as the average home cook can get without the use of molecular gastronomy. The ability to make something so perfectly crunchy on the outside and yet still juicy and tender on the inside, is, in my opinion, nothing short of Houdini-esque.

While my knowledge of traditional magic is limited to what I've experienced at Disney World and its College Park counterpoint, R.J. Bentley's Filling Station, my knowledge of kitchen magic is pretty extensive. And the ability to sear a protein well is one of the best tricks I can pull out of my hat.

Searing, in which the outside surface of a food is cooked at high heat until a crunchy, caramelized crust forms, is ridiculously easy and has the added benefit of making your food look much fancier than it actually is. The trick is getting your sautee pan extremely hot so that the outside of the food begins cooking much faster than the inside, resulting in that crunchy, intensely flavorful outside.

For this recipe, I used two gorgeous tuna steaks and crusted the outsides with a cumin-heavy spice mixture before searing them in a little oil. I would have used coconut oil if I had it, but sadly sunflower seed oil had to do. I served the tuna steaks with a traditional mixture of rice and green peas and the result was a totally Caribbean vibe that made me want a piña colada and a hammock. Super yum. Super fast. Super healthy (so you can eat more cookies after dinner, duh).

Some quick tips:

- Avoid a nonstick pan for this. Cast iron or stainless steel are better.

- Use just about tablespoons of canola oil to lightly grease the pan. It has a much higher smoke point than EVOO and won't begin to burn before you put your food in.

- Pat the meat/fish/poultry dry before you put it in the pan. This will help it to sear properly instead of just steaming.

- DON'T FUTZ WITH IT. Seriously, you will be much happier if you leave your dinner alone to do its own thing instead of poking at it every five seconds. Just let it be for a few minutes, flip it and repeat. The meat has to stick to the bottom of the pan to get that coating; it will naturally release when it's ready to be turned.

Ingredients:
2 tbs. crushed cumin seeds or ground cumin
1/4 tsp. garlic powder
1/4 tsp. salt
1/8 tsp. cayenne or crushed reds
4 tuna steaks
2 tbs. coconut or canola oil
2 tbs. lime juice
2 tbs. cilantro or parsley, roughly chopped
Lime wedges for serving

1. In a small bowl, combine the cumin, garlic powder, salt and cayenne. Stir well to blend. Sprinkle evenly over the tuna steaks, coating completely. Shake off any extra.


2. Heat oil in a large skillet over high heat. Place tuna in skillet (do it in batches if you can't fit them without crowding) and partially cover.

3. Sear for about 3 minutes, then flip the fish and sprinkle with the lime juice. Continue to cook until lightly browned on the outside and opaque in the center, about 3 more minutes.


4. Transfer tuna to plates and sprinkle with the chopped herbs. Serve immediately.


Saturday, April 11, 2015

French Kisses


Tonight, after eight long days of misery and matzoh meal, Passover ends. At sundown, I will be forking seafood pasta (with shrimp, mussels and clams -- oops, sorry #treyf) into my mouth with hideous abandon.

And to celebrate, I highly recommend you make this disgustingly good baked french toast. It's a Paula Deen original so you KNOW it's chock full of butter, racism and sugary goodness. Wait what?

But seriously, just 20 minutes of prep plus a sleepover in the fridge tonight equals gooey, cinnamony breakfast tomorrow.

Because the grocery store was low on the french bread supplies on Saturday evening (everything is closed on Sundays here), this is what I bought:


Because pecans don't exist in Spain I used walnuts in the streusel topping and it still tasted fantastic. Additionally, this kept well in the fridge for several days. Tommy was overheard to have said that it's the best french toast he's ever had.

And because I'm an intrepid journalist I told him to say that.

In my opinion, this french toast doesn't need any maple syrup (ack, gag) or other toppings. Just serve it piping hot out of the oven and it will make its own buttery, cinnamony sauce. It's okay to lick the plate. You deserve it.

Pairs well with: an exceptionally strong latte, a good Bloody Mary and the knowledge that Passover won't come again for another whole year. L'chaim to that!

Ingredients:
1 loaf French bread or slightly stale challah (13 to 16 ounces)
8 large eggs
2 cups half-and-half
1 cup milk
2 tablespoons granulated sugar
1 teaspoon vanilla extract
1/4 teaspoon ground cinnamon
1/4 teaspoon ground nutmeg
Dash salt

For the Praline Topping:
1/2 pound (2 sticks) butter
1 cup packed light brown sugar
1 cup chopped pecans
2 tablespoons maple syrup
1/2 teaspoon ground cinnamon
1/2 teaspoon ground nutmeg

Directions:

1. Slice French bread into 20 slices, 1-inch each. (Use any extra bread for garlic toast or bread crumbs). Arrange slices in a generously buttered 9 by 13-inch flat baking dish in 2 rows, overlapping the slices.

2. In a large bowl, combine the eggs, half-and-half, milk, sugar, vanilla, cinnamon, nutmeg and salt and beat with a rotary beater or whisk until blended but not too bubbly. Pour mixture over the bread slices, making sure all are covered evenly with the milk-egg mixture. Spoon some of the mixture in between the slices. Cover with foil and refrigerate overnight.


3. The next day, preheat oven to 350 degrees F.

4. To make the praline topping, combine all ingredients in a medium bowl and blend well.

5. Spread praline topping evenly over the bread and bake for 40 minutes, until puffed and lightly golden.

Monday, April 6, 2015

I Can't Believe it's Not (Peanut) Butter!

Here is a true fact about me: I am wholly, unabashedly, potentially dangerously, unrepentantly addicted to peanut butter.

I have been known to eat it with a spoon straight out of the jar...at someone else's house.

Seriously, I might have a problem.

So much so that I made Tommy bring a 1 lb. jar of Whole Foods All Natural Crunchy to Spain with us (taking the place of several very important things he intended to pack). NOT SORRY.

My sainted mother sent me another jar just a few months later and we had been portioning it out (read: I was not allowed to stick a soup spoon in there for breakfast) until further supplies could be located.

But then Tommy got me/us a blender for Valentine's Day. Romantic, I know. No seriously, he knew how much I wanted one. And in between hummus and velvety-smooth soups, Tommy decided to make peanut butter.

And make peanut butter he did. This is without question the best peanut butter I've ever tasted. Between the two of us we were taking "healthy fats" to a whole new level. It was getting somewhat worrisome. Everything went out the window when he added a whole bar of dark chocolate to the last batch. I don't even have words for it. I was almost mad at him, it was that good.

Then Tommy decided he was going to make almond butter. I am a big fan. Not only is it a fun change from my BFFPB but it is also crazy delicious in its own right. Huge shoutout to MaraNatha which makes my current favorite basic almond butter.

We decided to get fancy with it and make vanilla almond butter with cinnamon and while we nearly set the blender on fire, the butter was DEFINITELY worth the squeeze. Would we make it again without a proper food processor? No, probably not. It was a pain. But once I get back to Chicago, all bets are off.

Also fun fact, almond butter is Kosher for Passover whereas peanut butter is not. I know. Worst holiday ever. At least Yom Kippur is only one day of torture.

A quick note: be patient with the poor almonds. It takes about 15 minutes for the butter to really get going. Don't give up on them.

Ingredients:
2 c. raw almonds
2 tbs. honey
1 tsp. vanilla
1 tsp. cinnamon
1/2 tsp. sea salt

1. Carefully toast the almonds in a large saucepan over medium-low heat until fragrant, about 5 minutes. Watch them carefully so they don't burn. Let cool.


2. In a blender or a food processor, combine all the ingredients.


3. Pulse until the almonds are grainy and pretty finely ground, about 1-2 minutes. Scrape down the sides as needed.


4. Let the blender/food processor run for about 10-15 minutes until the oils start to release. Again, scrape down the sides as needed, and again BE PATIENT.

Enjoy on toast, apple slices or a spoon.

Friday, March 20, 2015

Rosemary's Baby

I know I just posted yesterday, but I'm sick and I'm bored and I really don't feel like studying for my Spanish certification exam so consider yourselves very lucky.

That being said, because I am sick and cranky and can't hear out of my left ear, this will not be a fun and bubbly post. I'm too grumpy.

Anyway.

Sometimes I get all into making a fancy main course like a whole roasted chicken or shepherd's pie (coming soon to a blog near you) and I end up with zero inspiration for the side dishes.

I'm already worn out from ripping errant tail feathers out of a chicken carcass or attempting to skin fish so the last thing I want to do is whip up a batch of cranberry and almond wild rice or make some homemade mashed potatoes.

Therefore, I bring you these little gems. They're beyond easy and also, happily, beyond delicious: they're rosemary and garlic smashed potatoes. I made these to go along with some baked salmon for Tommy and he's been asking me to make more ever since. I recommend making a large batch because not only do they reheat exceptionally well but they would also be fantastic as part of a breakfast skillet with sausage, eggs and asparagus.

Do yourself a favor and only use fresh rosemary for these. If you try and use dried the flavor won't be the same at all really and they won't be great. Also, don't overcook the taters when you boil them or they'll just fall apart during the baking stage.

Also fun, these are kosher for Passover! I know, that hideous holiday is creeping right up on us. Because my parents are the world's greatest and my mother is Queen of the Care Package, I received a box of Manischewitz goodies including egg matzoh, matzoh ball soup mix and honey cake. I'm going to try to keep K4P but we'll see how that goes. At least I can inflict some minor damage on my intestinal system with the supplies my parents sent me. I'm so loved.

Ingredients:
10 small red potatoes, scrubbed
1/3 c. EVOO
2 tsp. fresh rosemary, chopped
3 medium cloves garlic, minced
1/2 tsp. sea salt
1/4 tsp. freshly ground black pepper.

1. In a large pot, bring water to a boil. Cook the potatoes, completely covered in water, until tender--about 20 to 25 minutes.

2.  Remove the potatoes, cool and drain on a clean dish towel for a few minutes. Preheat the oven to 450 and line a baking sheet with foil or parchment paper.

3. Carefully smash the tops of each of the potatoes with a measuring cup or the palm of your hand (carefully!!!) until each potato is about 1.5" thick.


Drizzle the EVOO evenly over and under all the potatoes and distribute the garlic, rosemary, salt and pepper among them.


4. Bake until crispy and golden brown, about 25 to 30 minutes.


Thursday, March 19, 2015

Souped Up

If you know me at all, you know my feelings on souped-up vehicles which is to say: I view them with crushing scorn accompanied by an eye-roll so fierce that my eyeballs threaten to get stuck facing opposite directions in their sockets.
Something like this.
Your matte paint job reminds me of long, fake nails with a pink-tinged French manicure. Your lack of a muffler makes me want to call the cops and report you to the Department of Motor Vehicles for some unknown violation (yeah, I'm THAT person). Your absurd yellow halogen headlights are not only supremely stupid looking but incredibly dangerous for all oncoming traffic. Your car, as a whole, inspires me to open my own chop shop where I use the 3-pound meat cleaver my dad got as a gift from his younger bother where I service only your car and by service I mean hack that godforsaken thing into bits and then recycle it, piece by piece, while you watch.


Souped up cars are not my thing.

But souped up cold remedies sure as hell are. Oh yes my friends, I am on my second ear infection of the school year. My left ear is throbbing with pain and I imagine an inside view of my sinuses looks like a water park clogged with sodden autumnal foliage. Take a second and picture that.

I've told you all before that when I'm sick I am a fiend for soup. I love soup so much I want to take it behind the middle school and get it pregnant (credit: Tracy Jordan). I especially love this soup, which is something of an acquired taste.

Because as much as I hate dumb, souped up cars, I FREAKING LOVE KOREAN FOOD. Yes, that was a big jump, but you will soon learn why.


I am blessed to have not one but two half-Korean friends who introduced me to the wondrous joy that is K-food long ago. From hot stone bowls to fresh tofu to old kimchi to fish cakes to tiny chili-covered fish to unpronounceable baked goods filled with bean curd and mango, I love it all. The gigantic Korean grocery H-Mart is my happy place and I fully enjoy being one of three white people when I visit.

I also fully enjoy when either of my friends or their Korean family members cooks for me. I am a total mooch and I will certainly invite myself over when they are having Korean barbecue. I actually have requested lunch that my friend Tammi's mother cook me a special lunch on more than one occasion and because Tammi is a kind soul she relays that message to her mother Kai and I get to stuff my face.

One of my favorite things that Kai makes is a soup called miyuk gook. It's a really simple combination of broth, seaweed, cooked rice and bits of beef. Tammi always eats it when she's sick and it's become one of my favorite comfort foods when I'm feeling under the weather as well.

Of course if you're not super into seaweed it might not be your jam, but I am a huge fan of that weird salty stuff and have been known to snack on sheets of plain nori paper so...

This is a bastardized recipe for that incredibly comforting soup. It comes together really quickly, and if you don't have any beef lying around you can certainly leave it out.

Now I'm going to go back under my quilt and watch 8 more episodes of Friends. I hate being sick.

Ingredients:
2.5 c. dried miyuk seaweed, cut into strips (can be found at most Asian groceries or specialty foods stores)
1 tbs. sesame oil
3 tbs. soy sauce
2 cloves of garlic, minced
About 4 oz. beef, drained of blood and minced
6 c. water
1 c. cooked white rice

1. Rehydrate the miyuk in a large bowl of water for about 20 minutes. It will grow substantially so use a good-sized bowl.

2. While the seaweed is soaking, sautee the beef with the sesame oil, soy sauce and garlic until not quite cooked through.

3. Remove the seaweed from the water bath, drain, sprinkle with kosher salt and rinse thoroughly.

4. Add the miyuk to the beef and continue to cook for another 5-6 minutes. Add the water and the cooked rice and bring to a boil. Let simmer for about 20 minutes and serve immediately.


Sunday, March 8, 2015

Let's Get Baked

Sunday is a perfect day, in my opinion, to bake. No, not the kind that's legal in all the fun states, the kind with measuring cups and flour and butter and sugar.

Actually, I prefer my kind. Not only does the high last longer (very few things bring me greater joy than watching a perfect batch of cookies come out of the oven), but the rewards are far greater: you get to eat something delicious. Also you don't end up laughing hysterically at an episode of My Name is Earle and wondering how you got there.

Now to be fair, if you want to bake and then bake (your choice of what bake comes first), these cookies will probably taste even more out-of-this-world. My only request is that you let a grownup handle the oven and don't use any heavy machinery.

These cookies are perfectly wintery. The oatmeal is toasty and soothing and the dried cranberries add a much-needed shot of bright tartness to these dull, grey days we have to slog through until Spring decided to get her shit together and show up.

Not only that, they're pretty damn easy to make as far as the world of cookie baking goes. No refrigeration or fancy ingredients required, no need to ice pretty designs or do anything more than dump a tablespoon full of dough onto a greased cookie sheet.

I used baking chocolate to drizzle over the tops of these cookies but you could make life easier on yourself and use white chocolate chips instead. I probably will the next time I make these. I recommend using very high-quality white chocolate in these cookies, as the cheaper brands have a nasty, artificial flavor to them. At home, my favorite white chocolate is the Whole Foods brand that comes in chunks, priced per pound.

I also recommend using dried cranberries that are lower in sugar, so not Craisins, for example. Their tartness is one of the nicest things about these cookies.

When I make these again I'm considering adding a little bit of orange extract and topping the cookies with a little bit of orange zest. If you're feeling adventurous, feel free to go ahead and do this. If not, that's okay too. These cookies are extremely delicious-as is but also serve as an excellent blank palette if you're feeling inspired. Dark chocolate chips, chopped pecans, toasted coconut and dried blueberries all could be incredible additions.

So go ahead and bake up this Sunday. It's been a long week. You deserve it. Hope you've got some episodes of Workaholics on demand...

Ingredients:
1 cup salted butter, room temperature
3/4 cup dark brown sugar
1/2 cup sugar
1 egg
2 tsp vanilla extract
1 3/4 cups all purpose flour
1 tsp baking soda
1/2 tsp baking powder
1/4 tsp cinnamon
1 1/2 cups uncooked quick cook oats
1 1/2 cups dried cranberries
1/2 cup walnut pieces, toasted, optional

12 oz good-quality white chocolate chips (or chunks)

1. Preheat oven to 350F. Beat butter and sugars together until smooth and well-combined. Add egg and vanilla extract and mix well.


2. In a separate bowl, sift together the dry ingredients. Add to the wet mixture and mix just until all the flour is incorporated. DO NOT OVERMIX. 


3. Fold in the white chocolate chips, walnut pieces and cranberries.

4. Drop by rounded tablespoon onto a well-greased cookie sheet. Bake for 8-10 minutes or until just barely golden brown -- they should actually look a little undercooked in the center.

*5. IF NOT USING WHITE CHOCOLATE CHIPS: Let cool for a few minutes while melting the white chocolate in a double boiler. Cookies should no longer be hot to the touch when drizzling the white chocolate. Add another sprinkle of crushed walnuts on the chocolate if desired.


Wednesday, March 4, 2015

I'm Quin(oa) on You

If you know me at all, you know that I'm more than just keen on quinoa. I frickin love that stuff, and I don't know why. Maybe it's the nutty, toasty taste or the slightly crunchy texture. Maybe it's the 45 grams of fiber per serving or the crazy amounts of protein. Maybe it's just because I feel like I did hot yoga for 6 hours after eating just one serving of it (seriously, there's no better way to feel superior than to eat quinoa).

Sadly, Spain has not jumped on the grain train quite yet. Apart from the ubiquitous rice and couscous, (the food so nice they named it twice) it's hard to find any cool grains out here. Luckily, I have a mother who loves me and she sent me a bag of quinoa in a care package. Good thing too, because the last care package had about 4 pounds of Halloween candy in it.

As such, I have been carefully parceling this quinoa out serving by serving, hoping to make it last as long as possible. Then I created this recipe and it all went out the window. This recipe is so good it's a double-edged sword. I call it a power bowl because it has every ingredient you need to power through a long day or re-energize after a workout. Tommy thinks that name is pretentious and it sort of is but what do you expect from a girl who wants her funeral to be held at Whole Foods?

The way I make this recipe is vegan but if you want to add chicken, go for it. A lot of other vegetables would taste good too: snow peas, bean sprouts, edamame, you name it. The sauce itself is also pretty flexible in terms of spice and sweetness. I like a relatively even balance of flavors but it's totally up to you.

To save time I usually stab the sweet potato with a fork a few times and stick it in the microwave for 5 minutes or so. If you do that, this recipe only takes about 20 minutes to put together completely.

Eating this power bowl makes you feel kind of absurdly healthy so feel free to combat that with a dozen or so Oreos. It's what I like to do.

NOTE: I did have more and better pictures of them but this genius lost them somewhere on the depths of her computer. Stay tuned.

Ingredients:
For the Bowl:
1 c. quinoa, cooked according to instructions
1 medium sweet potato, steamed until soft and cubed
2 c. broccoli florets
2 c. raw baby spinach
1 c. firm tofu, drained and cubed
1 tbs. ginger, minced
2 cloves garlic, minced
Kosher salt and pepper to taste
2 tbs. neutral flavored cooking oil

For the Sweet and Spicy Sauce:
1 tbs. Sriracha
1 tsp. honey
1 tbs. sunflower seed oil
1 tbs. sesame seed oil
Juice of 1/4 lemon

1. Heat the oil in a large sautee pan over medium-low heat until it shimmers. Add the garlic and ginger and cook for about a minute, stirring constantly. Add the broccoli, stir, cover and cook for about 3 minutes or until bright green.

2. Meanwhile, season the tofu cubes all over with kosher salt and pepper. Add to the sautee pan with the broccoli and cook, stirring often, until the tofu is golden brown.

3. Add the spinach at the very end and cook just until wilted. Mix all ingredients together in a large bowl with the quinoa and cubed sweet potato.

To make the sauce: combine all ingredients in a small bowl and whisk well to combine. Pour over the power bowl, whisking constantly.

Sunday, February 22, 2015

Cold as Rice

I genuinely feel sorry for all of my friends and family in the States right now. I do not envy you the current, fearsome cold snap that FROZE Niagara Falls and dumped so much snow on the Northeast that Mayor Martin Walsh of Boston in a public statement legitimately encouraged people to stop jumping out of their second-story windows into the drifts.

Today in Almería it was so warm that I walked around without a coat on. Tommy currently has about 40 sprouted watercress seedlings on our front terrace. I would not trade with you guys for all the paella in Valencia (although I do envy your central heating in a fearsome way).

It's hard to want to do much more than huddle around a fireplace with a gallon of tea and a heated blanket when the weather is so nasty, but you do have to eat somehow. And since driving conditions across much of the country are incredibly dangerous, it's better to cook at home rather than order in and force some poor delivery kid to fight icy roads or go out to eat and take the risk yourself.

Thusly I present to you a 30-minute meal that will warm you up ("stick to your ribs," my mom would say), cost you very little and utilize probably what you already have in your fridge at home: brown rice primavera.

Primavera means spring in both Spanish and Italian, so while the weather outside might still be frightful, this recipe loaded with bright greens will help distract you for a short while. Typically, primavera is a pasta dish. Subbing the pasta with brown rice, however makes it much healthier and gluten free, if that's your jam (#Gluten4Life). This recipe comes together even quicker if you use a rotisserie chicken but you could also just use any chicken you have on hand; give it a quick sauté with EVOO, salt and pepper and you're good to go. Also feel free to add any other veggies you have lying around that need to be used up. I can see zucchini and carrot ribbons both being very tasty. If you want to get crazy, sub the brown rice for quinoa or another grain. It'll be good no matter what most likely

Ultimately, keep your chins up. The cold weather won't last forever, unless you are unfortunate enough to live somewhere like Saskatchewan. Just remember how miserable you are now when you're complaining about humidity in August. Really, which would you prefer?

Ingredients:
1 c. brown rice, cooked according to directions
2 tbs. EVOO
1/2 c. finely chopped red onion
1 bunch asparagus, woody ends snapped off and chopped into 1.5" spears
2 cloves garlic, minced
1 c. fresh or frozen peas
1 1/2 c. shredded cooked chicken
2 c. chopped baby spinach leaves
Kosher salt and pepper to taste
1/4 c. parmesan cheese to serve

1. Heat olive oil in a large pan over medium heat. Add the garlic and onion and cook until fragrant.

2. Add the asparagus and cook just until bright green and tender, about 5 or 6 minutes. Add peas and continue to cook for another few minutes.

3. Stir in chicken and rice. Add the spinach and stir until it is just wilted, about 3 minutes. Season with salt and pepper and serve immediately with a sprinkle of parmesan.


Wednesday, February 18, 2015

U-G-L-Y You Ain't Got No Alibi

Not all food is pretty. More specifically, not all GOOD food is pretty. Examples like three-bean chili, almost any form of stew and oysters leap to mind. Tastes good, looks like dog food. Such a pain to photograph.

To quote Jonathan Swift (who was surprisingly sassy): "He was a brave man who first eat an oyster."

But just because dinner is ugly doesn't mean you should hate. Embrace the homely. Encourage it to pluck its eyebrows and dress for its body type. Try and arrange it lovingly on a bed of rice or quinoa. Wait. I'm confused.
This is my best Catholic friend who is giving up everything for Lent. 

In honor of one of my best friends who is giving up all things delicious for Lent, (including meat, eggs, fish, cheese, refined carbs and beer) dinner tonight is a quick red-bean stew. It's super-fast, vegan, malleable and keeps well in the fridge. It's vaguely reminiscent of bean chili but with less of a Tex-Mex flavor profile.

I've served it over rice and quinoa both but feel free to experiment with other grains like farro and freekeh. Make sure to use something with good texture though because otherwise it'll be a big pile of mush. If you're feeling fancy it would also pair well with cornbread.

Feel free to adjust the spice levels to your liking. Sweet corn, jalapeños and shredded chicken are all good additions as well. The original version of this recipe started out with cubed, seasoned chicken as one of the main ingredients but in order to keep it lower-impact Tommy and I have stuck to making it vegan.

Ingredients:

3 or 4 cans red beans (depending on how large a batch you'd like to make)
1 medium white onion, chopped
1 red pepper, chopped
1/2 mild green pepper, chopped
3-4 tomatoes, chopped OR 1 can diced tomatoes in juice
3 tbs. EVOO
1/2 tsp. garlic powder
1/4 tsp. onion powder
1/2 tsp. salt
1/2 tsp. freshly ground pepper
1/4 tsp. very spicy ground red pepper or crushed reds (adjust to taste -- what we've been using packs a powerful punch)
1 c. vegetable stock

1. In a large stock pot, sautee onion, green and red peppers


until the onion is starting to brown and get fragrant. Add the tomatoes and cook for another 2-3 minutes or until the tomatoes begin to break down.


2. Add all seasonings and cook for another minute or two more until flavors combine.

3. Add the beans and cook, stirring occasionally for about 20 minutes or until the beans start to break down. Add the stock and stir to combine. Let simmer for another 5 minutes or so. Serve over rice/quinoa/etc.


NOTE: Tommy likes to mash the beans against the side of the pot to give it a smoother texture. I personally prefer leaving the beans whole but it's up to you.

Wednesday, February 11, 2015

Mini Me

Unless you live under a rock, you know that Valentine's day is coming up. This Saturday. Boys, that gives you three whole days to scrape together a halfway decent present.

And FYI, if you go to Jared, she's going bye now. Seriously, have some self respect.

And while I'm on the subject, every kiss might begin with "K" but every fight does too. Even if the jewelry from Kay's wasn't fugly, I don't think I could buy it because their advertisements are so damned painful to watch.

But anyway, sometimes you don't have the dinero to buy your S.O. heart-shaped bling or whatever sentimental tchotchke. That's why it's helpful to know how to cook, regardless of your gender.

I know it sounds all repressed and 1950s but ladies, knowing how to cook a nice meal says so much more than "I have my MRS. degree and I am frothing at the mouth to bear your children." It also says: "I took the time to make something nice for you that you can't buy in a store" and "I know what you like to eat besides a spicy chicken sandwich from Chik-Fil-A." It's personal and sweet and that old adage that the way to a boy's heart is through his stomach is TRUE with a bullet. How do you think I've landed all my boyfriends? Not just with my feminine wiles and biting wit. Nothing says settle down and date me like a dozen banana muffins with cinnamon pecan topping.


A nice girl knocks on a boy's front door and waits there. A smart girl goes around back with a freshly-frosted cake and climbs in through a window.

Or you know, does her own thing and doesn't wait around for some dude. Either way.

And boys, being able to cook a few nice things looks very good on your transcript too. Because a sad number of millennial males are total bozos in the kitch, if you can throw together a reasonable plate of chicken and veggies (or really anything besides boxed pasta) you are in like sin. Plus you look cute in an apron.


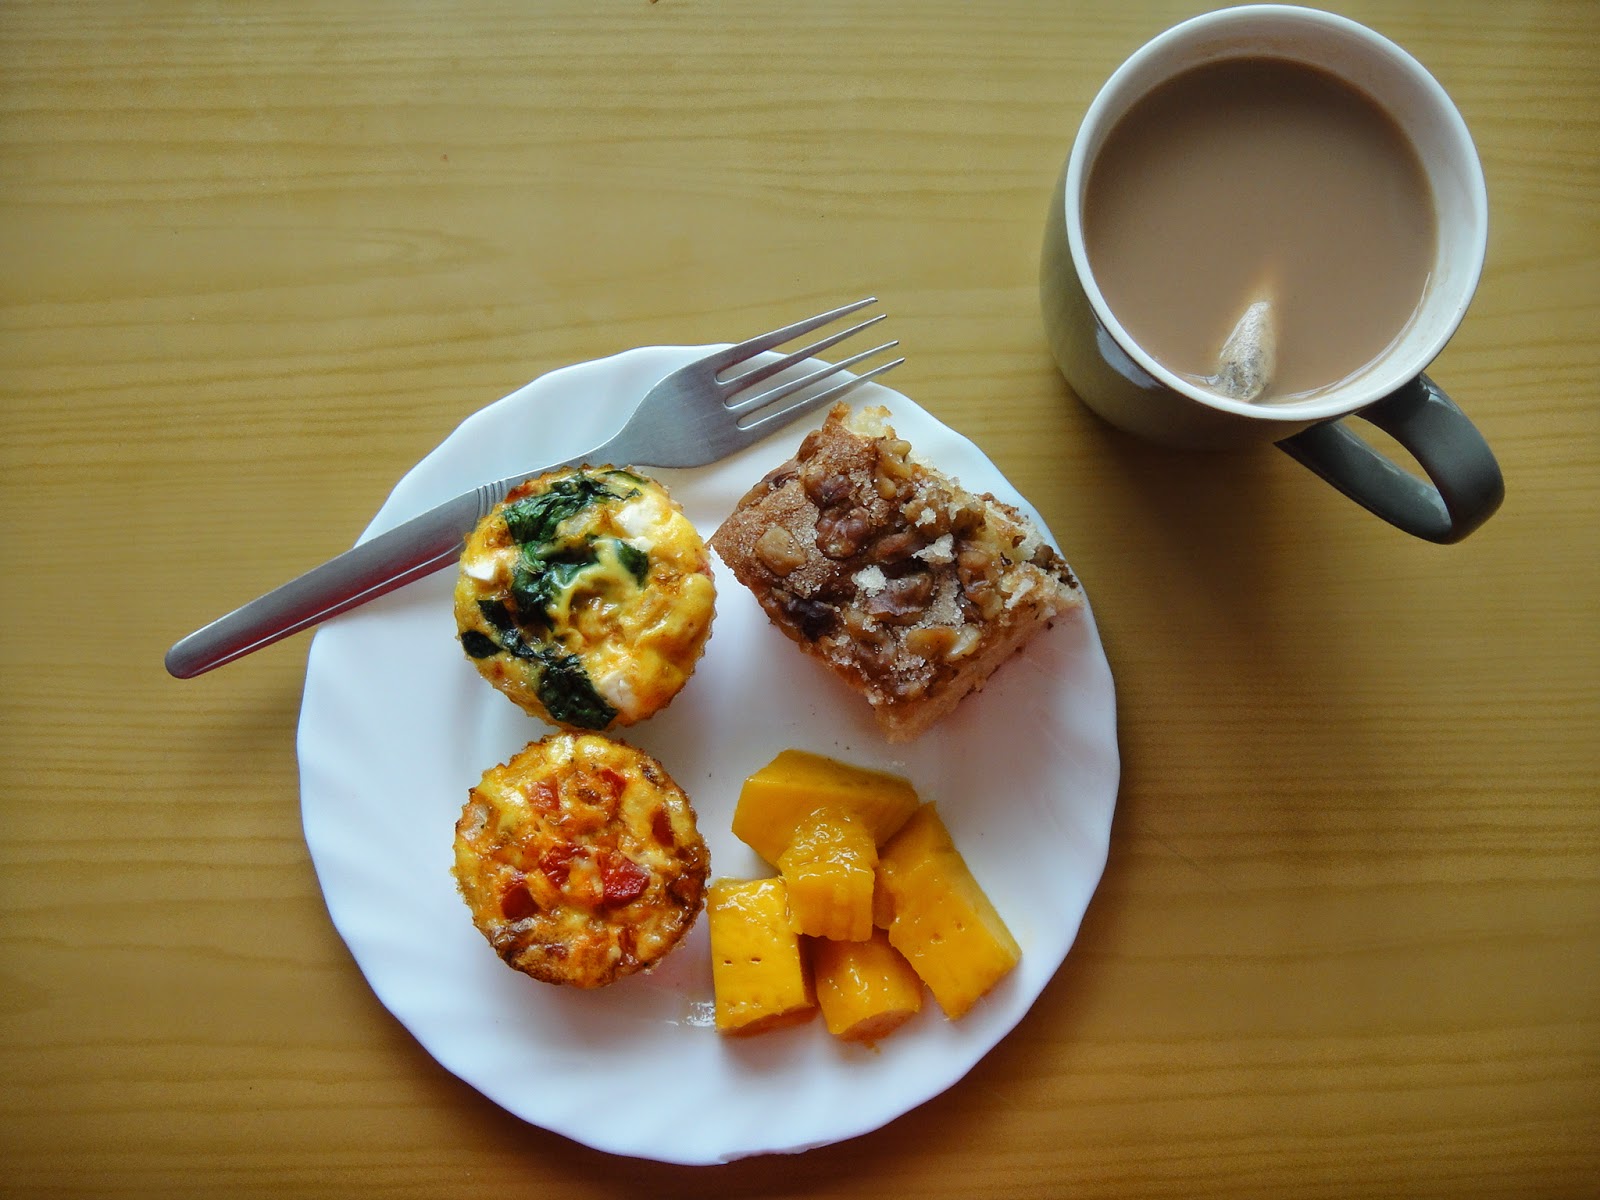
Therefore I present to you mini frittatas. They are easy as anything, look adorable, and take very little effort. Although I strongly discourage breakfast in bed for a number of reasons (crumbs in the sheets, everything gets cold, hard to get comfortable with a loaded tray on your knees), these are perfect for a late breakfast or brunch. Depending on when you wake up. Ahem.

All you have to do is slice up some fruit, toast some nice crusty bread or shell out for decent pastries and you have a damn fine meal on your hands. It's less stressful than having to cook a whole dinner and they keep well in the fridge too. Can you say breakfast on the go? They're also easily customizable so load them up with anything and everything you can think of. Broccoli, cheddar, peppers, sausages, ham chunks, tomatoes, spinach, feta, green onions -- the frittata is your oyster. Which is an aphrodisiac, by the way.


Ingredients:
(Makes about 16)

8 eggs
1/4 c. skim milk
1/4 c. chopped fresh spinach
1/4 c. cubed feta
1 medium tomato, cubed
1/2 c. red pepper, cubed
1/3 c. onion, diced and divided
1 spicy sausage (andouille, chorizo) link or 2-3 small breakfast sausages
Kosher salt and freshly ground black pepper to taste

1. Grease a muffin tin and preheat the oven to 350.

2. In two separate pans, gently sautée the spinach with half the onion and the red pepper and sausage with the other half until cooked through.


3. In a large bowl, beat the eggs until blended but not too frothy. Add the milk, salt and pepper to taste and whisk again.

4. Divide the egg mixture among the muffin cups, filling each about one-third of the way


Add your fillings of choice, and finish with more egg.


5. Bake for about 20 minutes or until firm in the center. Run a butter knife around the frittata to loosen and serve immediately.