Showing posts with label Paleo diet. Show all posts

Thursday, May 7, 2015

Orange You Glad...


...I'm not going to finish that horrible joke? The temptation was significant, let me tell you.

Sorry for the brief hiatus but Tommy and I decided to go to Switzerland for a long weekend. Yes, I know, I am living the dream. Also they really do know their chocolate and cheese out there.

Were it not for the fact that it is the most absurdly expensive place I've ever been, I would totally move there. Gorgeous scenery, amazing food and the cleanest bathrooms I've ever seen. Everywhere we went. Seriously. As those close to me can tell you, this is very important to me. In other news, after eating gruyere fondue in Gruyere (heh), The Melting Pot is totally ruined for me.

As fun as the weekend was, it was expensive and pretty darn heavy as far as culinary options go. We did manage to eat a ton of ethnic food however which made me incredibly happy. Thai, Indian and Ethiopian (Tommy's first time!) were all happily consumed. Especially the Ethiopian food. Those people know their way around a lentil, let me tell you.

Therefore, Tommy and I have wanted to keep things pretty light since we got home. Lots of fresh fruits and veggies, not quite as much chocolate (but really still kind of a lot...whatever). This is a whacked-out quasi-fruit salad that makes fantastic use of the wealth of citrus fruits we are blessed with out here, plus the overwhelming supply of olives. It sounds like a strange and even unappetizing combination but trust me, the sweet/sour/salty flavors play together in the nicest possible way.

Additionally, you don't have to cut the oranges into supremes (the fancy way to say peeled wedges) but it makes consumption easier and looks really pretty. Here's a good step-by-step tutorial if you're interested.

It's worth it to use good quality olive oil if you have it for this recipe. A bright, grassy flavor will play best with the citrus. If not, good old extra-virgin will do as well.


This is a great side dish and would pair well with most whitefish and maybe couscous. In fact, that sounds pretty damn good for dinner tonight. This also works best if it sits briefly (30 minutes, give or take) to let the flavors really meld. If you have culinarily adventurous friends, this would make an awesome potluck dish: you will look like a super inventive chef and you don't even have to tell them it only took 15 minutes to put together.

Ingredients:
4-5 oranges (mix of navel, blood, etc.), cut into supremes
1/2 c. pitted green olives, roughly chopped
1/2 red onion, chopped
1/4 c. good-quality olive oil
2-3 tbs. fresh chives, finely minced

1. Carefully supreme your oranges, or alternatively, slice them into thin rounds.

2. Combine the oranges, green olives and red onion in a medium sized bowl and drizzle with the olive oil, mixing to combine.


3. Refrigerate for about 30 minutes. Add chives just before serving.

Tuesday, April 14, 2015

Now You Sear Me, Now You Don't

Searing food is about as close to magic as the average home cook can get without the use of molecular gastronomy. The ability to make something so perfectly crunchy on the outside and yet still juicy and tender on the inside, is, in my opinion, nothing short of Houdini-esque.

While my knowledge of traditional magic is limited to what I've experienced at Disney World and its College Park counterpoint, R.J. Bentley's Filling Station, my knowledge of kitchen magic is pretty extensive. And the ability to sear a protein well is one of the best tricks I can pull out of my hat.

Searing, in which the outside surface of a food is cooked at high heat until a crunchy, caramelized crust forms, is ridiculously easy and has the added benefit of making your food look much fancier than it actually is. The trick is getting your sautee pan extremely hot so that the outside of the food begins cooking much faster than the inside, resulting in that crunchy, intensely flavorful outside.

For this recipe, I used two gorgeous tuna steaks and crusted the outsides with a cumin-heavy spice mixture before searing them in a little oil. I would have used coconut oil if I had it, but sadly sunflower seed oil had to do. I served the tuna steaks with a traditional mixture of rice and green peas and the result was a totally Caribbean vibe that made me want a piƱa colada and a hammock. Super yum. Super fast. Super healthy (so you can eat more cookies after dinner, duh).

Some quick tips:

- Avoid a nonstick pan for this. Cast iron or stainless steel are better.

- Use just about tablespoons of canola oil to lightly grease the pan. It has a much higher smoke point than EVOO and won't begin to burn before you put your food in.

- Pat the meat/fish/poultry dry before you put it in the pan. This will help it to sear properly instead of just steaming.

- DON'T FUTZ WITH IT. Seriously, you will be much happier if you leave your dinner alone to do its own thing instead of poking at it every five seconds. Just let it be for a few minutes, flip it and repeat. The meat has to stick to the bottom of the pan to get that coating; it will naturally release when it's ready to be turned.

Ingredients:
2 tbs. crushed cumin seeds or ground cumin
1/4 tsp. garlic powder
1/4 tsp. salt
1/8 tsp. cayenne or crushed reds
4 tuna steaks
2 tbs. coconut or canola oil
2 tbs. lime juice
2 tbs. cilantro or parsley, roughly chopped
Lime wedges for serving

1. In a small bowl, combine the cumin, garlic powder, salt and cayenne. Stir well to blend. Sprinkle evenly over the tuna steaks, coating completely. Shake off any extra.


2. Heat oil in a large skillet over high heat. Place tuna in skillet (do it in batches if you can't fit them without crowding) and partially cover.

3. Sear for about 3 minutes, then flip the fish and sprinkle with the lime juice. Continue to cook until lightly browned on the outside and opaque in the center, about 3 more minutes.


4. Transfer tuna to plates and sprinkle with the chopped herbs. Serve immediately.


Monday, April 6, 2015

I Can't Believe it's Not (Peanut) Butter!

Here is a true fact about me: I am wholly, unabashedly, potentially dangerously, unrepentantly addicted to peanut butter.

I have been known to eat it with a spoon straight out of the jar...at someone else's house.

Seriously, I might have a problem.

So much so that I made Tommy bring a 1 lb. jar of Whole Foods All Natural Crunchy to Spain with us (taking the place of several very important things he intended to pack). NOT SORRY.

My sainted mother sent me another jar just a few months later and we had been portioning it out (read: I was not allowed to stick a soup spoon in there for breakfast) until further supplies could be located.

But then Tommy got me/us a blender for Valentine's Day. Romantic, I know. No seriously, he knew how much I wanted one. And in between hummus and velvety-smooth soups, Tommy decided to make peanut butter.

And make peanut butter he did. This is without question the best peanut butter I've ever tasted. Between the two of us we were taking "healthy fats" to a whole new level. It was getting somewhat worrisome. Everything went out the window when he added a whole bar of dark chocolate to the last batch. I don't even have words for it. I was almost mad at him, it was that good.

Then Tommy decided he was going to make almond butter. I am a big fan. Not only is it a fun change from my BFFPB but it is also crazy delicious in its own right. Huge shoutout to MaraNatha which makes my current favorite basic almond butter.

We decided to get fancy with it and make vanilla almond butter with cinnamon and while we nearly set the blender on fire, the butter was DEFINITELY worth the squeeze. Would we make it again without a proper food processor? No, probably not. It was a pain. But once I get back to Chicago, all bets are off.

Also fun fact, almond butter is Kosher for Passover whereas peanut butter is not. I know. Worst holiday ever. At least Yom Kippur is only one day of torture.

A quick note: be patient with the poor almonds. It takes about 15 minutes for the butter to really get going. Don't give up on them.

Ingredients:
2 c. raw almonds
2 tbs. honey
1 tsp. vanilla
1 tsp. cinnamon
1/2 tsp. sea salt

1. Carefully toast the almonds in a large saucepan over medium-low heat until fragrant, about 5 minutes. Watch them carefully so they don't burn. Let cool.


2. In a blender or a food processor, combine all the ingredients.


3. Pulse until the almonds are grainy and pretty finely ground, about 1-2 minutes. Scrape down the sides as needed.


4. Let the blender/food processor run for about 10-15 minutes until the oils start to release. Again, scrape down the sides as needed, and again BE PATIENT.

Enjoy on toast, apple slices or a spoon.

Friday, March 20, 2015

Rosemary's Baby

I know I just posted yesterday, but I'm sick and I'm bored and I really don't feel like studying for my Spanish certification exam so consider yourselves very lucky.

That being said, because I am sick and cranky and can't hear out of my left ear, this will not be a fun and bubbly post. I'm too grumpy.

Anyway.

Sometimes I get all into making a fancy main course like a whole roasted chicken or shepherd's pie (coming soon to a blog near you) and I end up with zero inspiration for the side dishes.

I'm already worn out from ripping errant tail feathers out of a chicken carcass or attempting to skin fish so the last thing I want to do is whip up a batch of cranberry and almond wild rice or make some homemade mashed potatoes.

Therefore, I bring you these little gems. They're beyond easy and also, happily, beyond delicious: they're rosemary and garlic smashed potatoes. I made these to go along with some baked salmon for Tommy and he's been asking me to make more ever since. I recommend making a large batch because not only do they reheat exceptionally well but they would also be fantastic as part of a breakfast skillet with sausage, eggs and asparagus.

Do yourself a favor and only use fresh rosemary for these. If you try and use dried the flavor won't be the same at all really and they won't be great. Also, don't overcook the taters when you boil them or they'll just fall apart during the baking stage.

Also fun, these are kosher for Passover! I know, that hideous holiday is creeping right up on us. Because my parents are the world's greatest and my mother is Queen of the Care Package, I received a box of Manischewitz goodies including egg matzoh, matzoh ball soup mix and honey cake. I'm going to try to keep K4P but we'll see how that goes. At least I can inflict some minor damage on my intestinal system with the supplies my parents sent me. I'm so loved.

Ingredients:
10 small red potatoes, scrubbed
1/3 c. EVOO
2 tsp. fresh rosemary, chopped
3 medium cloves garlic, minced
1/2 tsp. sea salt
1/4 tsp. freshly ground black pepper.

1. In a large pot, bring water to a boil. Cook the potatoes, completely covered in water, until tender--about 20 to 25 minutes.

2.  Remove the potatoes, cool and drain on a clean dish towel for a few minutes. Preheat the oven to 450 and line a baking sheet with foil or parchment paper.

3. Carefully smash the tops of each of the potatoes with a measuring cup or the palm of your hand (carefully!!!) until each potato is about 1.5" thick.


Drizzle the EVOO evenly over and under all the potatoes and distribute the garlic, rosemary, salt and pepper among them.


4. Bake until crispy and golden brown, about 25 to 30 minutes.


Saturday, March 14, 2015

Whitefish Privilege


Go out to eat at any restaurant with a good selection of fish on the menu. Listen to the tables around you ordering, or the waiter detailing the specials list.

A picky diner will want to be assured that the fish they haven't heard of is whitefish. A waiter will make sure to note the chef's whitefish of the night.

Beloved for its mild taste and firm, flaky texture, whitefish is given privilege above most other fish.

Certainly above the lowly sardine (fantastic when cooked fresh) or lesser-known varietals.
Whitefish can hold its own against big players like salmon and tuna but it unceremoniously stomps on all the other fish out there to eat.

This is a story about whitefish. Maybe.

Honestly, I have no idea what I bought from the Mercado. It was just fish, and unfortunately it still had all the bones still in it. Guess who has two thumbs and learned how to (badly) fillet a fish so dinner could get on the table? This girl.


This fish is incredibly easy to cook because it is poached -- simmered slowly in a seasoned bath until it is perfectly cooked from the inside out.

Although according to Willy Wonka, (the one in the book) nothing is truly poached unless it has been stolen from the woods in the dead of night.

I added green onions, ginger, garlic and crushed reds to my poaching liquid but you can feel free to add and subtract in any way you would like. Star anise pods, galangal and thai basil would put a nice Pacific-rim touch on the fish.
I served what was left of the fish with this mountain of bok choy.

You also have a lot of freedom in the type of fish you want to use: snapper, flounder and halibut are a few good choices. Tilapia might be a little too fragile.

A note: make sure that the heat is down really really really really really I cannot stress this enough really really low on the saucepan. You don't want the fish to cook too quickly; there should just be small bubbles around the outside of the pan.

Also you might notice there is no final "after" picture of the meal. That's because I dropped my plate on the ground and it didn't look too pretty after that. (PS: This happened like 2 months ago and I'm still not over it. I'm just thankful something like this never happened when I was waitressing over the summer.)

Ingredients:
8 green onions, chopped
1 1-inch piece ginger, sliced, plus 1 tsp. grated
1/2 tsp. crushed red pepper (or to taste)
4 6-oz. boneless, skinless pieces of fish
2 tbs. canola oil
1/4 tsp. sesame oil
2 tsp. soy sauce
1 tsp. sherry or red wine vinegar
Kosher salt
Fresh cilantro or parsley for serving

Directions:

1. Bring 4 of the green onions, the sliced ginger, 1/4 tsp. of the red pepper, 1 tbs. salt and 3 cups of water to a low simmer (tiny bubbles!!!) in a medium skillet.

2. Season the fish with 1/2 tsp. salt and add to the skillet. Cook until the fish is opaque throughout, 10-12 minutes.

3. Meanwhile, combine the canola and sesame oils, soy sauce, vinegar, grated ginger, remaining green onions and remaining crushed red peppers in a medium bowl. Let marinate for about 5 minutes.

4. Serve the fish on top of steamed jasmine or white rice, sprinkled with the parsley or cilantro leaves and the green onion relish.


Saturday, February 7, 2015

Do You Want to Build a Snowman?

First of all, let me apologize for the recent radio silence. Tommy and I moved to a new apartment and only just got our internet set up, no thanks to the perennially awful Orange.

Anyway, it is currently 55 degrees in my bedroom. It is currently 57 degrees outside. People are always telling me, "Oh Jess, you're so lucky to be living in Spain! I bet it's so nice and warm there!"

Well I'm calling bullshit. Yes, maybe we don't have to contend with a polar vortex or blizzards that would make your average midwesterner consider staying off the roads, but at least YOU ALL IN AMERICA HAVE CENTRAL HEATING.

I'm currently wearing a long sleeve thermal shirt, a wool sweater, a hoodie and a scarf. There is a blanket over my legs and one wrapped around my shoulders. I have given up on my ears and nose. They are being sacrificed to the weather gods.

Yesterday, Tommy and I were so cold that we just went and got back in bed under all 3 blankets in our fleece sheets (not flannel, FLEECE -- they are the effing greatest. It's like sleeping in a sweatshirt that's still all fuzzy) and took my travel alarm clock which has a thermometer under there with us. We huddled like two sad rabbits in a fuzzy rabbit warren and watched the numbers tick up degree by degree until it was confirmed that it was at least 20 degrees colder outside of the blankets. This depressed us somewhat.

Spain is great for a lot of reasons but apartment construction is not one of them. Stone captures all that cold and damp really effectively.

So to combat these bone-chilling temperatures, I'm giving you guys a recipe that will warm you right up...because it is spicy as all hell. Nothing like some good chili pepper sweats to make you forget that your pinky finger is starting to turn the color of a blueberry!

This recipe is incredibly easy and incredibly delicious as well. You would think that avocado and salmon don't go well together but you would also be wrong. Gotta get that good fat as TMo would say. This pairs nicely with some toasty brown rice to bring the flavors all together. Feel free to reduce the levels of heat if you're sensitive to spice but I think it's pretty damn delicious as is.

I made this in a George Foreman grill because they are the greatest invention ever but you can also grill the salmon or use your broiler. Just don't overcook it because ew.

Speaking of salmon, Tommy and I got the best piece of salmon I've ever tasted a few weeks ago. It was so mild and delicious it honestly was like eating pure butter. I love living in a coastal city. Seafood for everybody! Seafood for all! You get a fish and you get a fish and you get a fish everybody gets a fish!

Ingredients:

For the Salmon:
2 lbs. of salmon, cut into 4 pieces
1 tbs. EVOO
1tsp. salt
1 tsp. ground cumin
1 tsp. onion powder
1/2 tsp. garlic powder
1/4 tsp. ancho chili powder
1/2 tsp. crushed reds
1 tsp. freshly ground black pepper

For the Avocado Salsa:
2 avocados, diced
1/2 small red onion, roughly chopped
Juice from 2 limes
1 clove garlic, finely minced
1-2 tbs. finely chopped cilantro or parsley (I use parsley because cilantro tastes like soapy dishwater to me)
Salt and more crushed reds (if desired) to taste

1. Combine spice mixture in a small bowl.


2. Rub salmon fillets with EVOO and spice mixture, coating evenly. Refrigerate for 30 minutes (but no longer).

3. While the fish is chilling, combine all ingredients for the avocado salsa and chill.


4. Grill, George Foreman (I just made that a verb), or broil the salmon until flaky and no longer translucent in the center, about 5-8 minutes depending on thickness of the fillet.


5. Serve the salmon with a hefty dollop of avocado salsa on top.


Sunday, September 28, 2014

Veggie Tales

Sunday.

The day that reminds you just how many whiskey sours you drank last night (even though you SWORE you were going to stick to the less-caloric but infinitely more vile vodka-water-lime).

The day that reminds you just how often you mentally clocked out at 4 in the afternoon during the week...or 3:30 on Thursday and Friday.

The day that cooking magazines say you should set aside for lavish, multi-meat stews that simmer all day on the stovetop, drawing your attractive, loving and undoubtedly ethnic family from miles around to convene at your rustic wooden table for a beautiful dinner.

I'm calling bullshit.

Sorry Food and Wine, you know I love you, but ain't nobody got time for braciole when they're beating back an unprecedented hangover (or merely too preoccupied by the upcoming Bears-Packers game to work over an open flame).

Thusly, I present you a twofer: oven roasted broccoli and cinnamon-glazed baby carrots.

Both take less than 15 minutes to prep and don't require any weird ingredients. In fact, I will find it worrisome if you don't have all the ingredients for these recipes. They're healthy and extremely delicious, the broccoli especially--like what kale chips wish they could be when they grow up. And you can feel good about doing enough cooking to just make some plain pasta. Or, you know, order pizza.

Oven-roasted Broccoli

Ingredients:
1 large head of broccoli, chopped into smaller florets
About 1/4 c. EVOO
Kosher salt
Freshly ground black pepper

1. Preheat the oven to 400F.

2. Spread the broccoli florets evenly on a large baking sheet.

3. Drizzle with the olive oil and toss to coat. Add kosher salt and pepper to taste.

4. Bake for about 15 minutes, then toss. Bake for another 5-10 minutes depending on how crunchy you like your broccoli. Serve immediately.


Cinnamon-glazed Baby Carrots

Ingredients:
1 lb. baby carrots
1/4 tsp. cinnamon
1-2 tbs. canola oil (to taste)
1 tbs. honey

1. Preheat the oven to 350F.

2. In a large bowl, toss the carrot sticks with the canola oil and cinnamon.

3. Spread evenly in a baking sheet and bake for 15 minutes.

4. Remove carrots from oven and drizzle with the honey.

Stir briefly to coat and return carrots to oven for another 5 minutes or until desired texture is achieved. Serve immediately.


Sunday, February 23, 2014

What's the dill?

I don't know about the rest of the country, but it was damn beautiful in College Park these past few days. The weather has been absurdly springy--crocuses popping up, blue skies, temps above 50 degrees, the whole deal.

When the weather gets really pretty like this it makes me want to eat similarly springy foods. Ones that are bright and citrusy and won't put you into a carb coma. For me, this means seafood. One of the great things about going to school on the East Coast is that I get way better fish out here than I possibly could in Chicago. It's just a matter of logistics. Thusly, my body composition is roughly 60 percent seafood for eight months out of the year. I don't hate it.

Salmon is probably my favorite fish to eat, partially because it's so versatile and partially because it's very difficult to screw up. Tommy is also a big fan and when I visited him last weekend for Valentine's Day/C.R.A.S.H-B's (a massive indoor rowing race held annually in Boston) I decided to make salmon for him.

Since it was our first Valentine's Day together, we wanted to make it special and go to a nice restaurant. Only thing was, when we tried to find a reservation in January, everything was booked until 10 pm and your only dining option was a $100-plus pre fixe menu. So we said to hell with that, and I offered to cook us a nice dinner.

Tommy went off to afternoon practice and I went to Whole Foods to get the salmon. I got a gorgeous piece and the fishmonger very kindly removed almost all of the pin bones for me. Upon returning to the apartment, I realized Tommy had forgotten to give me his keys. I sat outside his door with a pound of salmon and a bottle of champagne in my bag for about five minutes, trying to decide what to do. My only choice was to schlep all the way over to the boathouse, a 20-minute walk from the apartment.

But I had no choice. So I went to the boathouse and as I was getting the keys who should walk out of the locker room but one of the coaches, and he looked none too happy to see me. I got out of there pretty fast.

Luckily it was cold so the salmon didn't suffer any after sitting in my Longchamp for 40 minutes while getting smashed by bottle of champagne. And dinner turned out perfectly.

This recipe is super duper easy and only requires three ingredients besides salt, pepper and olive oil. It also looks really pretty which is an added bonus. It's a perfect dinner for this mild weather, until the second polar vortex hits anyway...

Ingredients
1 lb salmon (not steaks)
2-3 lemons
1/8 c. olive oil plus 1 tbs.
5-6 tbs. dill, minced
Salt and pepper to taste

1. Oil the bottom of a baking dish with the 1 tbs. of olive oil. Line the bottom with the lemons, thinly sliced.

2. Mix together the dill, remaining olive oil and salt and pepper to taste.


3. Place the salmon, skin-side down, on the lemons. Spread the dill-oil mixture on top, covering the flesh evenly.

4. Bake at 350 degrees for about 20 minutes, depending on the thickness of the filet.


Saturday, November 17, 2012

Pluck you

I was a strict vegetarian for 4 years and an active member of PETA for none of those years. Even before I stopped eating meat, I was not a fan of touching or even looking at the raw stuff before it appeared on my plate brilliantly cooked by one of my parents.

My mom still doesn't even love touching raw meat so maybe it's a genetic thing.

Anyway, if you've been to dinner at my house, chances are you've seen me pick up a chicken breast with a fork, season it using a small spatula, throw it into a frying pan/baking dish/etc. and then wash my hands repeatedly.

For whatever reason, I don't have the same problem with raw fish. Probably because my body composition is at least 30% sushi.

The meat situation in Spain has forced me to get over my squeamishness. If you want a boneless, skinless breast you're going to have to pay a premium for it. I also discovered that chicken breast, in comparison to other parts of the body, is relatively flavorless, no matter what you do to it. The previous restaurant critic at the Post-Gazette told me she hates chicken breast for this reason and I didn't believe her until I cooked a whole chicken for the first time and realized that every part of the chicken EXCEPT FOR THE BREASTS became a crispy inferno of lemony, thyme-scented goodness.

Well fan me with a brick. I'm a convert.

So yeah, Tommy and I bought a whole chicken (sans feet and head) and let me tell you they are some kind of cavalier about gutting and plucking their poultry over here because I ended up with not an insubstantial amount of plumage on my hands and half a kidney to boot.

Singeing the night away
Not being raised on a poultry farm, I was totally at a loss as to how to remove the feathers from my dinner so I did what any sensible suburban girl would do: I Googled it. Which is how I ended up dunking my stupid chicken in a sink full of simmering water and then singing the remaining feathers off over our gas stove.

And then I had to (and this literally made me gag) scoop out the remaining innards of the chicken praying to every major and minor deity I could think of that I would not throw up on our dinner before it even went in the oven.

I didn't, and thank god for that because once I was done shoving all manner of delicious things into the chest cavity and roasting it for over an hour it turned out to be one of the best dinners I've made while in Spain.

So if you're in the States you probably don't have to worry about plucking chickens but I do highly recommend you buy them whole because they're cheaper and go further and plus, taste a lot better. I've made one chicken with your basic herbs and then one BBQ and I'll put the recipes for both down here.

The prep is pretty easy but there are a lot of steps to it so don't get freaked out. Anyone can make this chicken, provided they have a little patience.

Don't be squeamish now because if I can do it, you can too. Don't be a weenie.

Ingredients:

For herbed chicken:
1 whole, medium (3-4 lbs.) chicken
1 lemon, halved
Kosher salt
1/4 c. EVOO
2 sprigs fresh thyme
2 sprigs fresh rosemary
4 cloves garlic
cracked black pepper
1/4 tsp. herbs du Provence or other herb mix

For BBQ chicken:
1 whole, medium (3-4 lbs.) chicken
4 cloves garlic
1 c. BBQ sauce
1/4 c. EVOO
Kosher salt
cracked black pepper

1. If there are still downy feathers on your chicken, you can singe them off over an open flame and then rinse the bird to get rid of the residue. Larger feathers you can pluck by hand after submerging the chicken in boiling water for a few seconds to loosen them.

The Cave of Wonders
2. For either chicken, shove a good handful of Kosher salt into the chest cavity and shake it around until it's coated. I don't know why you're supposed to do it but my mom always does and she is the preeminent chicken cooker in my house.
For the herbed chicken: shove the halved lemons, rosemary, thyme and 3 of the cloves of garlic (halved) into the cavity.
For the BBQ chicken: shove the halved garlic in there.

3. Make a slit down the bird's backbone and slice directly under the skin (above the muscle) on either side so you can shove the other halved clove of garlic in there.

4. In a small bowl, mix the olive oil, cracked pepper, a pinch of salt (and the herbs du Provence if making the herbed chicken) and spread evenly over the entire chicken, coating well. Rub with another clove of garlic if desired.
For the BBQ chicken: Spread 1/2 cup of BBQ sauce evenly over the bird. Reserve the other half for later use.

5. Bake at 350 degrees Fahrenheit for about an hour and a half, or until juices run clear. You can also insert a knife near the wing joint and check for doneness this way.
For the BBQ chicken: halfway through the baking process, spread the other 1/2 cup of BBQ sauce over the chicken.


And there you have it, a whole chicken. Once you do it the first time, you won't believe how easy it is. Plus, you can just shove it in the oven and basically forget about it and you have dinner about an hour later, plus leftovers to be sure. Plus, if you make this and it isn't fall off the bone tender you can kick me in the shins upon my return to the U.S.


Tuesday, November 13, 2012

Chip off the old block

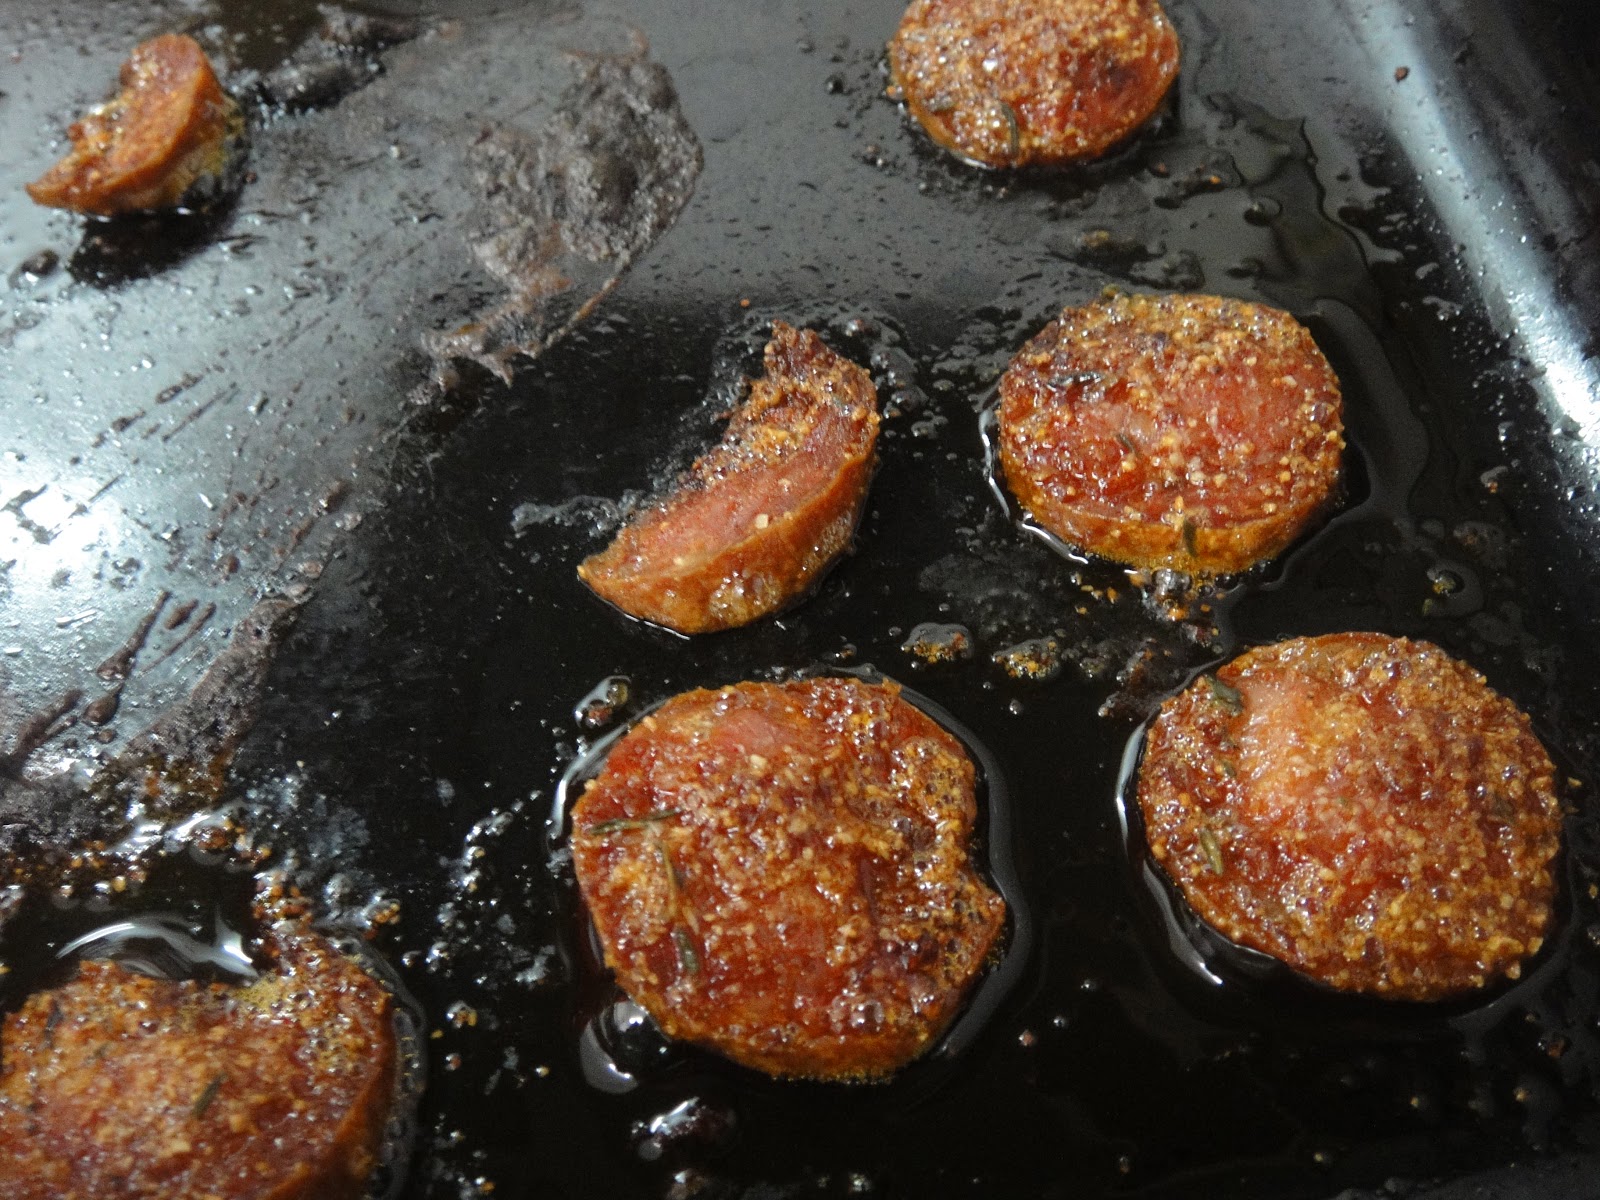
I bet you didn't know that if you have really gross cured chorizo you can slather it with a myriad of spices and bake it until it's crispy, and, once dunked in French's mustard, you will have a mostly edible chorizo chip.

This probably works even better with sausage you wanted to eat in the first place.

But we had a plethora of sausage we just didn't want to eat. And it didn't taste any better sauteed with some eggs and peppers.

It didn't even taste good with hot sauce.

So we got desperate.

...Desperately crafty that is.

We also made use of the end of the thyme fried almonds by stealing the loose thyme and salt from the bottom of the tupperware.

Basically we just sliced this crappy chorizo really thinly and smeared it with more spices and then baked it and suddenly we had a whole new dish on our hands.

Oddly, some of the cured chorizo in Alicante smells awfully like Tommy's Sperrys he's had since freshman year of college. And that is not a pretty scent.

So anyway, like I said, if you actually liked the chorizo (or sausage or salami or other hard cured deli meat) you had to begin with, you can probably skip the seasoning step and skip straight to the baking/chowing down step.

If your chorizo is bootlike or not flavorful enough, feel free to do as we did and you will likely be pleased with the results.

Make sure to slice the chorizo really thinly (if it's not already machine sliced) because the crispiness is the good part.

Ingredients:
10-15 thin slices of chorizo, salami, etc.
1/4 tsp. cayenne pepper
1/4 tsp. powdered garlic
Pinch of dried thyme
Pinch of salt

Mustard for serving.

1. On a large baking sheet, arrange the sliced chorizo and sprinkle with the various spices.


Bake for about 8-10 minutes at 350 degrees Fahrenheit or until crisp. Serve immediately with mustard.


Thursday, November 1, 2012

Planet of the apricots

Today's blog post brought to you by one very abused blender and the Whole Foods Recipe app. Also a seriously lazy day.
A day when all I want to do is lay in bed and eat Halloween candy and granola bars.

Except the granola bars here in Spain are actually pretty terrible.

So Tommy and I decided to be happy hippies and make our own using the ancient blender at his apartment which got very very warm during the course of its use.

Whoops.

We found this recipe for hemp seed apricot chews on the Whole Foods app and immediately said something along the lines of, "ew effing gross" and "what in the name of Nestle is a hemp seed and why would one eat such a thing."

Then we decided to change the recipe to fit our own purposes (aka not so disgustingly healthy and crunchy) and we came out with a chewy bar that was totally delicious and a lot less expensive than the crappy granola bars I bought at the store here. It was also full of seasonally appropriate autumnal colors. 

Mission accomplished.

The only annoying thing was we had to blend in batches so we didn't set the blender on fire and if we had the magical contraption that is the food processor this would have been a lot easier. So take it from me: use your food processor if you have one.

We liked these a lot better when they were cold than when they were room temperature because they got kind of awkwardly sticky but that was just us. These are also pretty much pure fiber so don't go crazy when you eat them or you might end up one very unhappy camper in the intestinal region and have no one to blame but yourself.

These keep, wrapped tightly in saran or in an airtight container, for about two weeks in the fridge. We cut them into individual squares after chilling them the first time for convenience purposes. This is also one where you can screw with it as much as you like. Use dried cherries or cranberries instead of apricots or add figs or prunes or whatever other dried fruit you'd like. We would've added pecans if they existed in this country but they just don't.

Ingredients:
3 c. dried apricots, roughly chopped
1 c. chopped pitted dates
1 c. walnuts
2 tbs. lemon juice
1 tsp. ground nutmeg
1/2 tsp. ground ginger
1 tsp. vanilla extract

1. Line an 8x8 pan with parchment paper (or use a disposable metal one like we did) and set aside.

2. In a food processor, pulse all ingredients until a chunky paste forms.


 Transfer to the pan and press with a spatula to create an even thickness.


3. Cover and chill until firm, 1 to 2 hours, and then cut into squares for serving.